How to Flash JetPack (BSP) on Tanna TechBiz Eagle-101 for NVIDIA Jetson Nano
Getting Started Flash JetPack
We can use NVIDIA Linux Software or we can directly use the NVIDIA Linux Driver Package via Linux command line to flash JetPack OS into the Tanna TechBiz Eagle-101.
We do not recommend using virtual machines and ARM architecture Ubuntu for flashing.
Before we can move on to the installation steps, we need to make sure that the board is in force recovery mode.
Hardware Preparation (Force Recovery Mode)
Before we can move on to the installation steps, we need to make sure that Tanna TechBiz Eagle-101 is in the force recovery mode.
Step-by-Step
Step 1. Before you start, you need to disconnect power of the Tanna TechBiz Eagle-101.
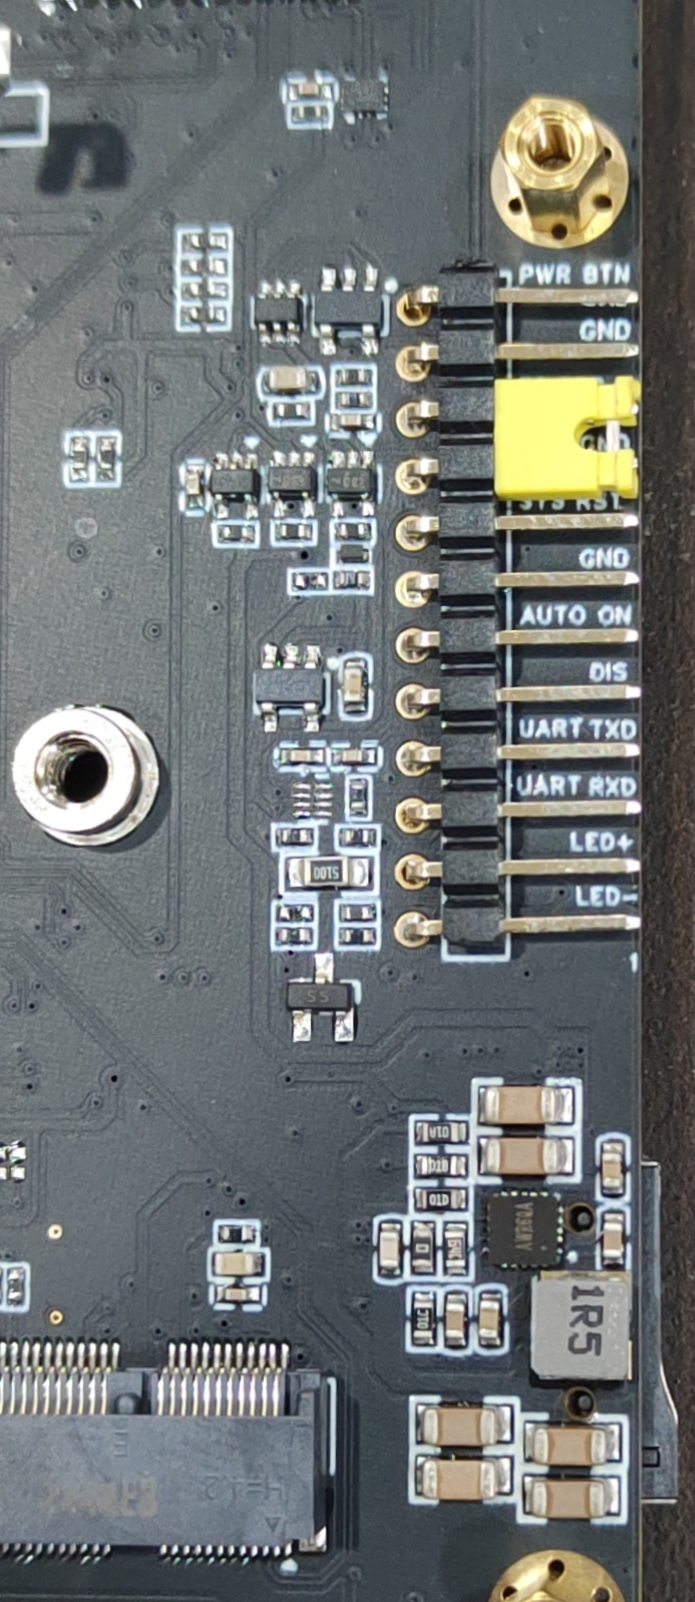
Step 2. Use a jumper to connect the FC REC pin (3) and the GND pin (4).
Button Header
Description
Button Header
Description
1
PWR BTN
7
AUTO ON
2
GND
8
DIS
3
FC REC
9
UART TXD
4
GND
10
UART RXD
5
SYS RST
11
LED +
6
GND
12
LED -
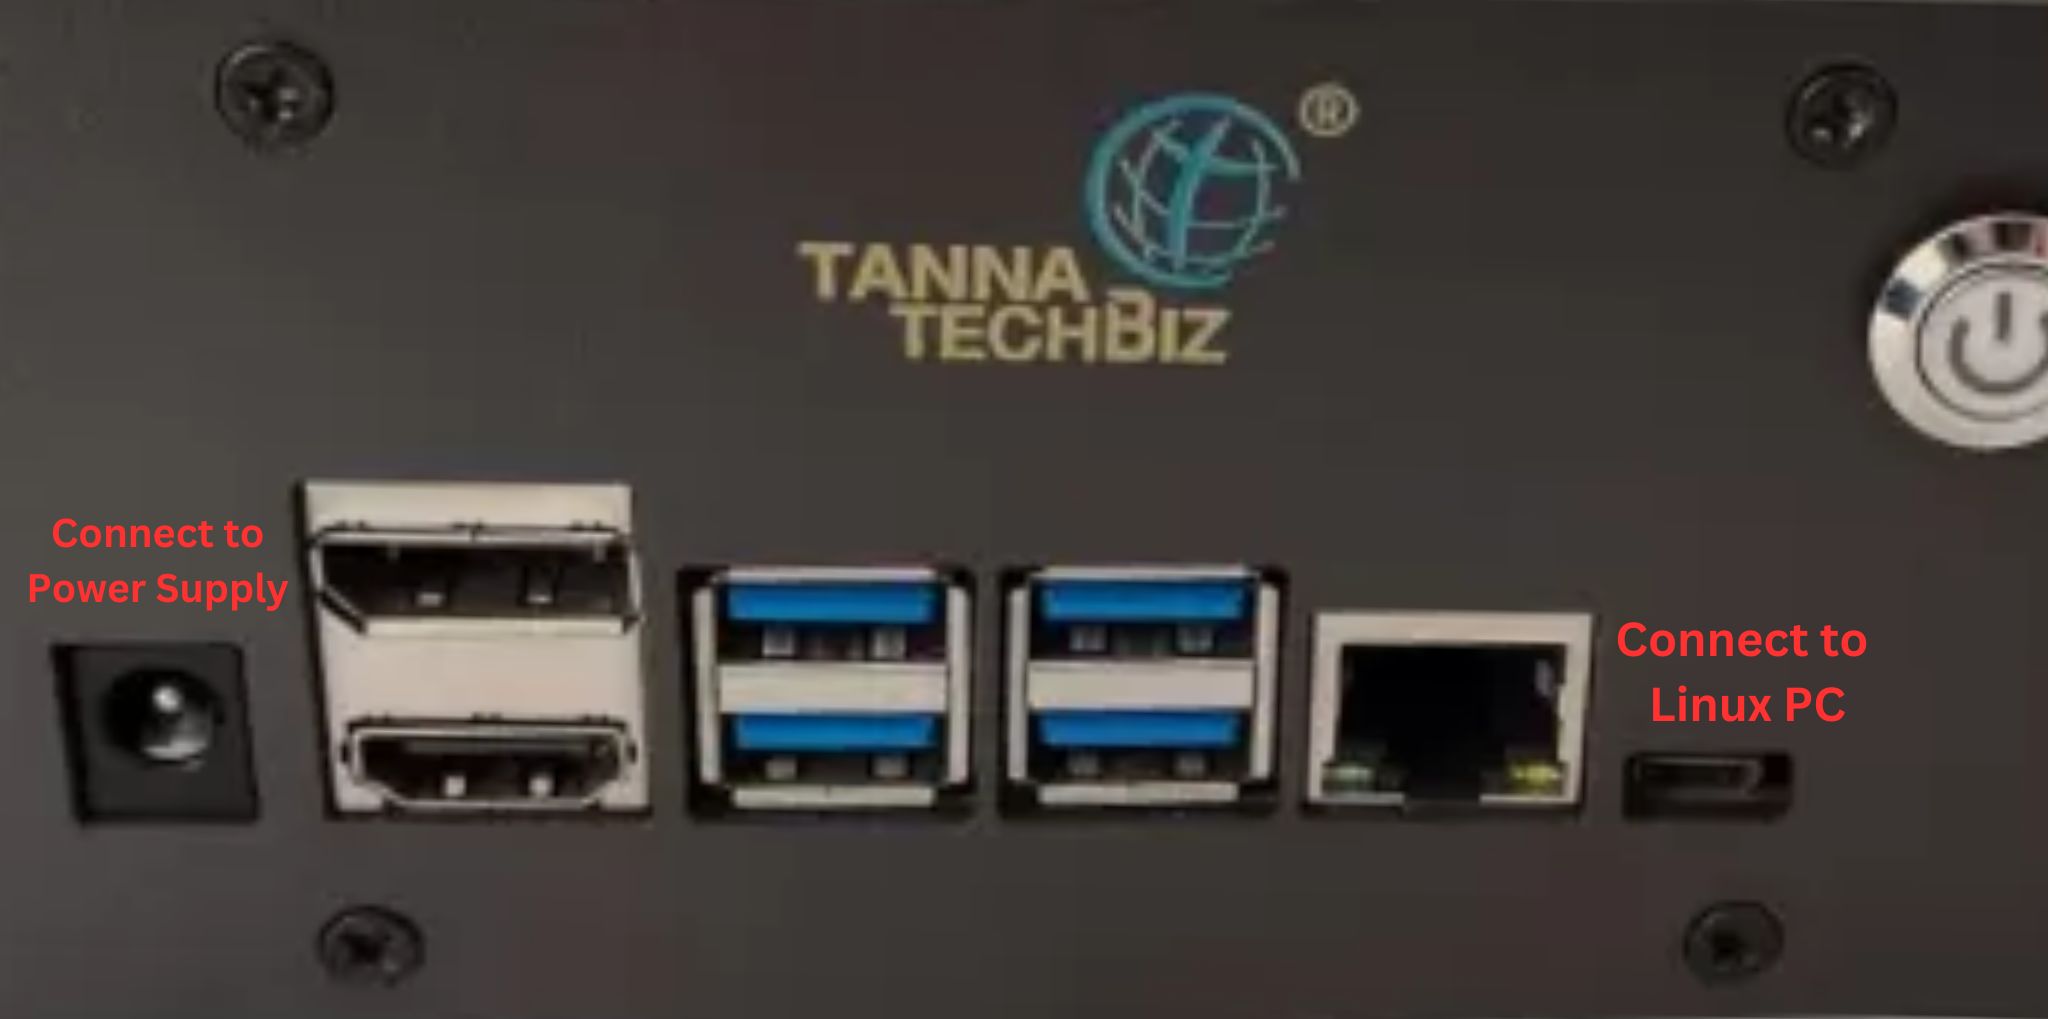
Step 3. Power up Tanna TechBiz Eagle-101 with a Type-B cable on the left of Tanna TechBiz Eagle-101 and use another side Type-A to connect the Linux Host PC on the right of Tanna TechBiz Eagle-101.
!!!Attention Before wiring, please pay attention to the power connector and data connector, please do not connect the data connector directly to DC power.
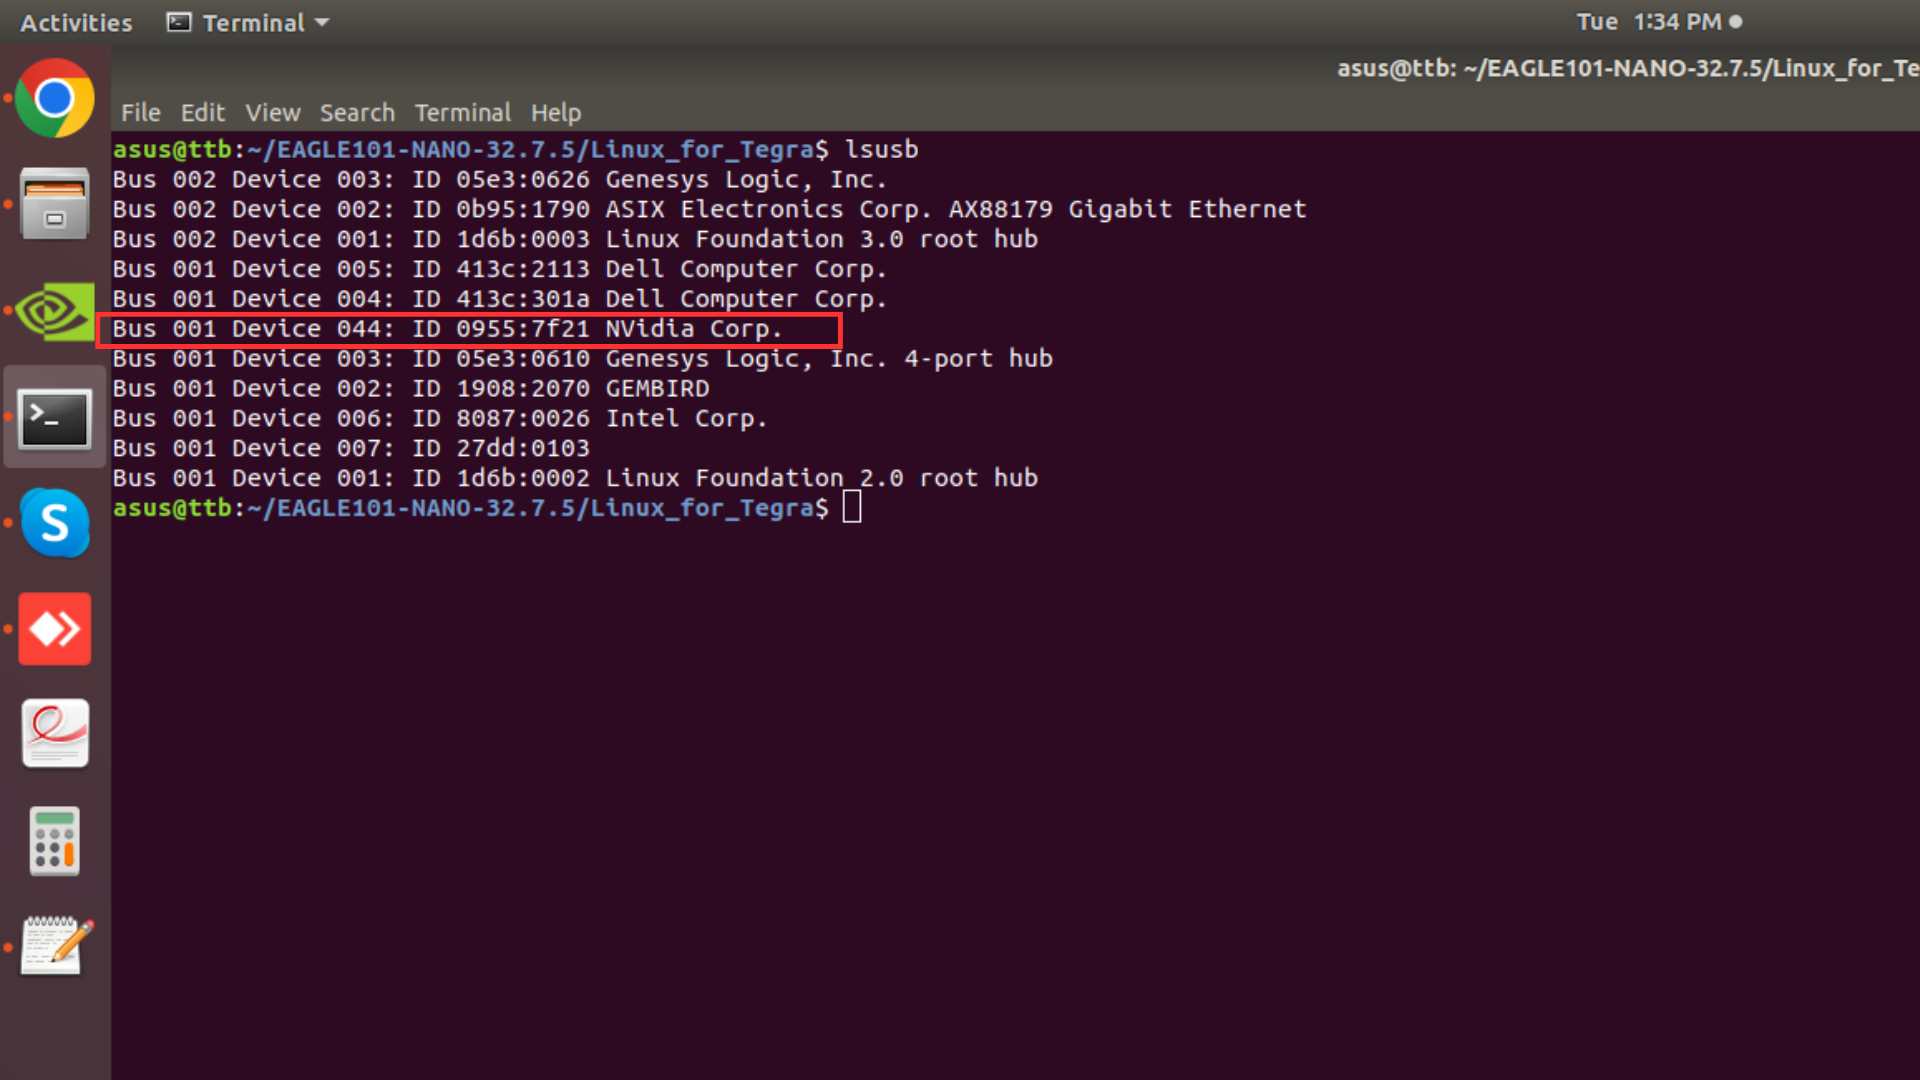
Step 4. Under the command line window of the host computer, enter the command lsusb. When the returned content has the ID 0955:7f21 NVidia Corp. in it, it means that Tanna TechBiz Eagle-101 is in the force recovery mode and we can proceed to the subsequent operations.
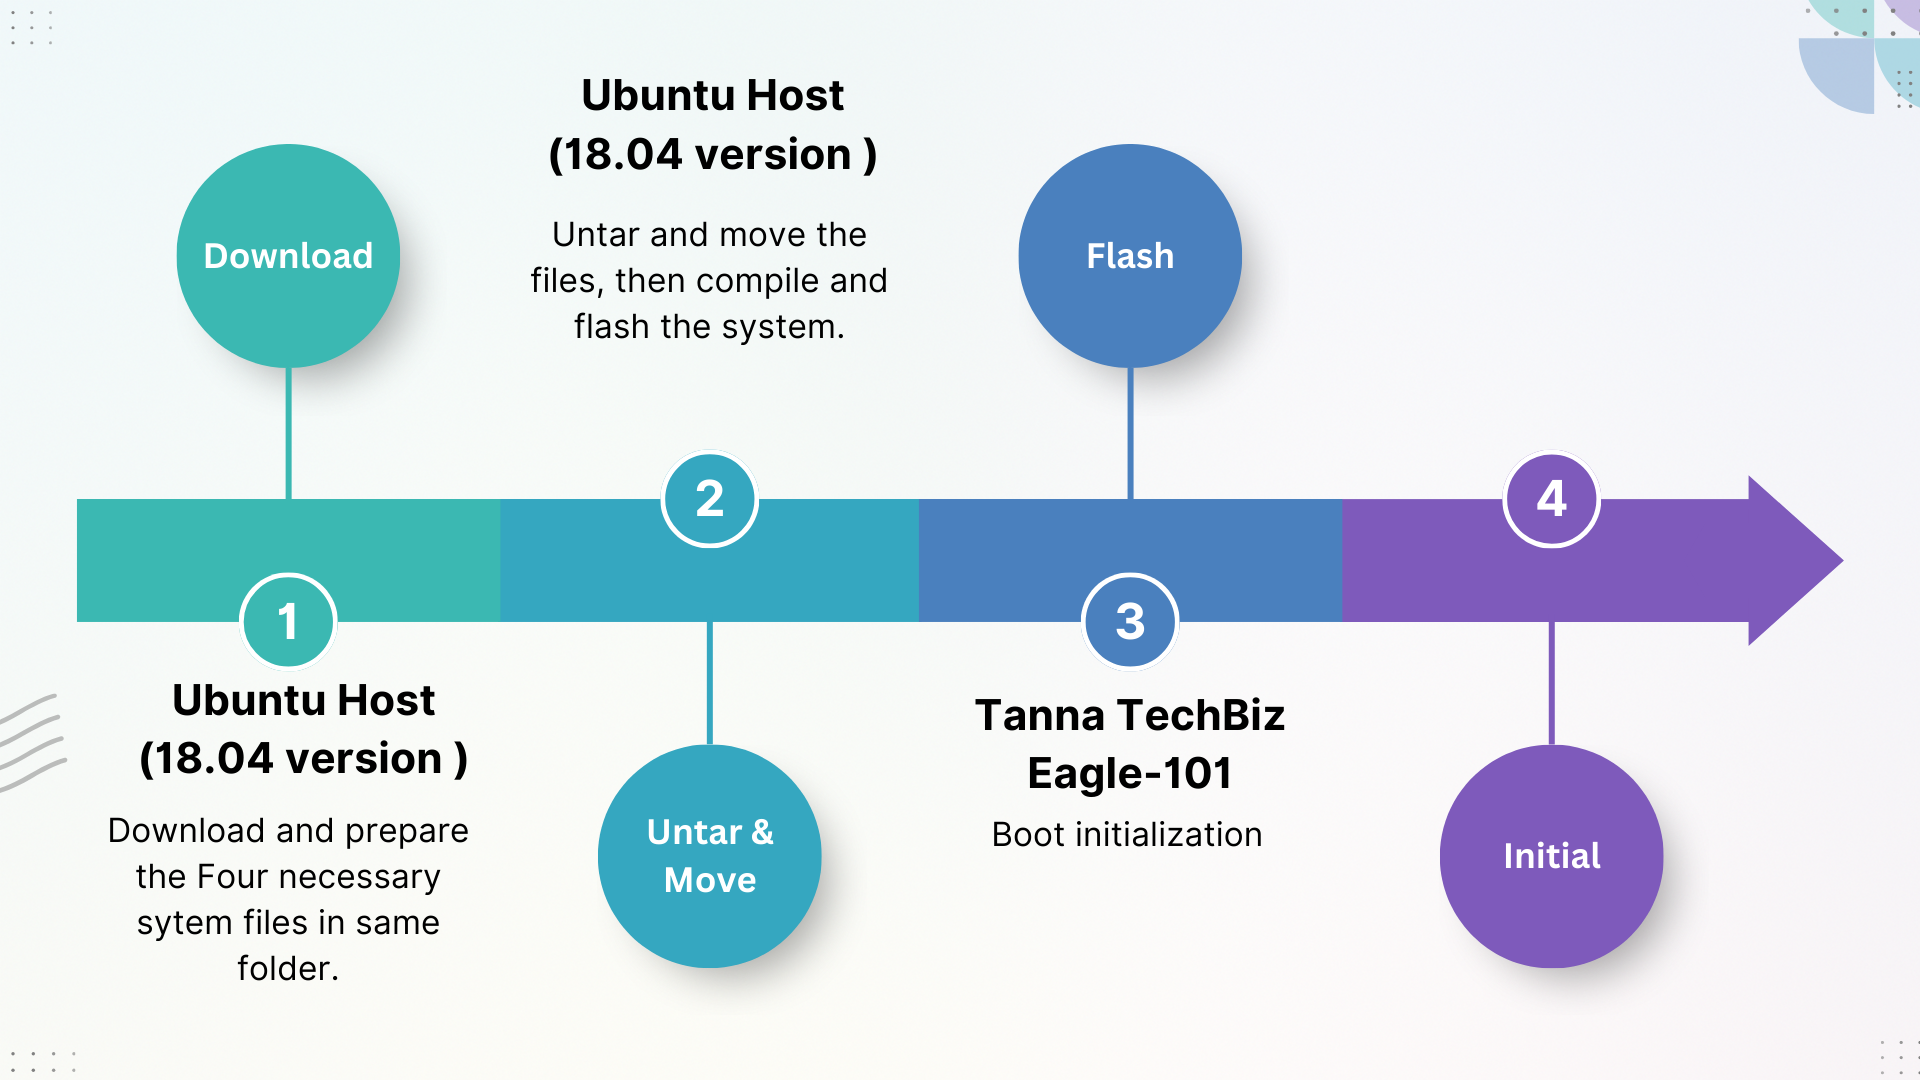
Flashing JetPack OS via Command Line
Thanks to the freedom to customize the BSP(NVIDIA Linux Driver Package), flashing JetPack OS via command line can be very easy for the Linux knowledge base users.
Step 1. Download the proper NVIDIA Linux Driver Package
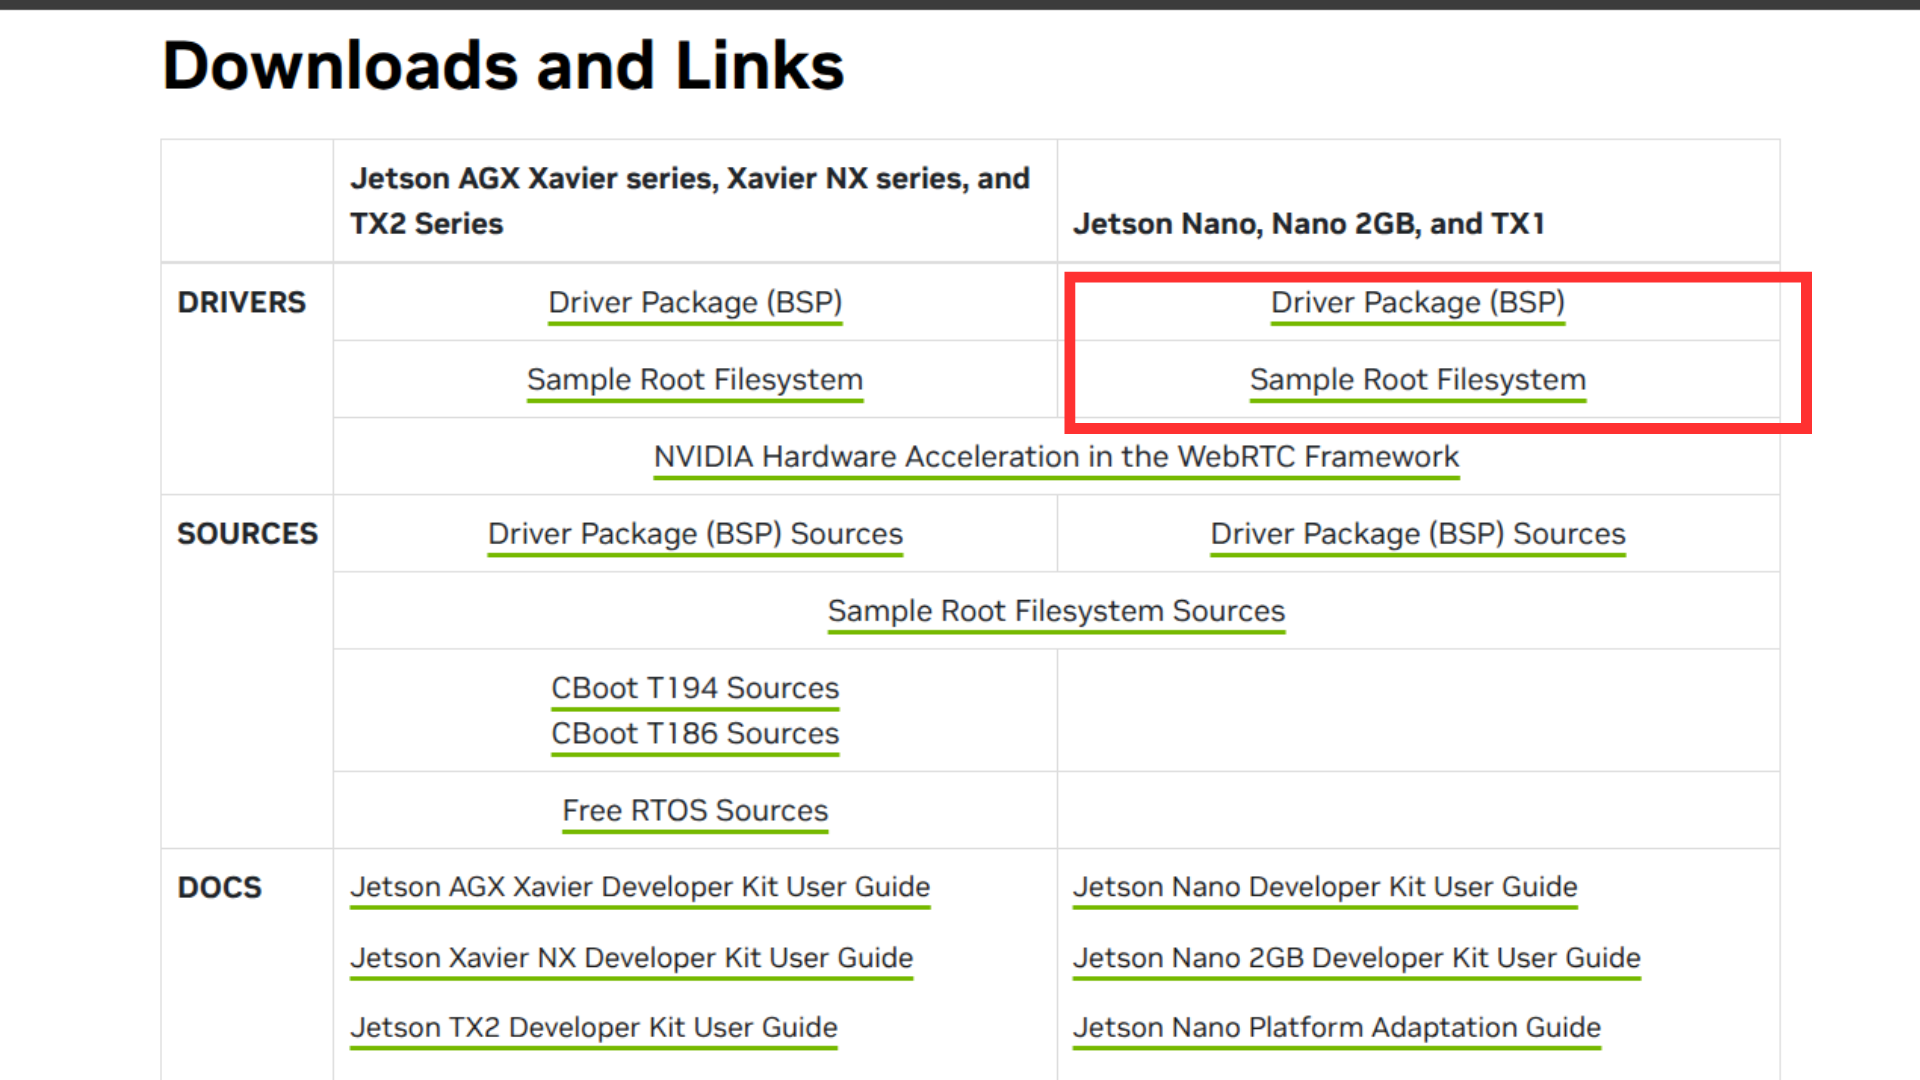
On the Linux host PC, we need to open a browser and go the Jetson Linux Archive. First we should check if the version of Jetson Linux is supported our Tanna TechBiz Eagle-101 Jetson Nano module.
Once you find the proper version, click to go to the downloaded page. Find and click the "L4T Driver Package (BSP)" and "Sample Root Filesystem" to download the driver files. The names of the files are like Jetson-210_Linux_Rxx.x.x_aarch64.tbz2 and Tegra_Linux_Sample-Root-Filesystem_Rxx.x.x_aarch64.tbz2 and overlay_32.7.5_PCN211181.tbz2 and tegra210-p3448-0002-p3449-0000-b00.dtb
As the example, we choose the NVIDIA L4T 32.7.5 version since it is included as part of JetPack 4.6.5 and supports the Jetson Nano module. The names of the files:
Step 2. Unzip Package Files and Assemble the Rootfs via Command Line
On the Linux host PC, we should create a new folder and store the package files in same folder, we download before. Then open a command line window(Terminal) at the folder and use the command line below to unzip the files and assemble the rootfs:
tar xf Jetson-210_Linux_R32.7.5_aarch64.tbz2
cd Linux_for_Tegra/rootfs
sudo tar xpf ../../Tegra_Linux_Sample-Root-Filesystem_R32.7.5_aarch64.tbz2
cd ../
sudo ./apply_binaries.sh
cd ../
tar xpf overlay_32.7.5_PCN211181.tbz2
cp tegra210-p3448-0002-p3449-0000-b00.dtb Linux_for_Tegra/kernel/dtb/
cd Linux_for_Tegra/
once you have done recovery mode & Connect host System to Eagle-101 The output should be like: command : lsusb
When the returned content has the ID 0955:7f21 NVidia Corp. in it
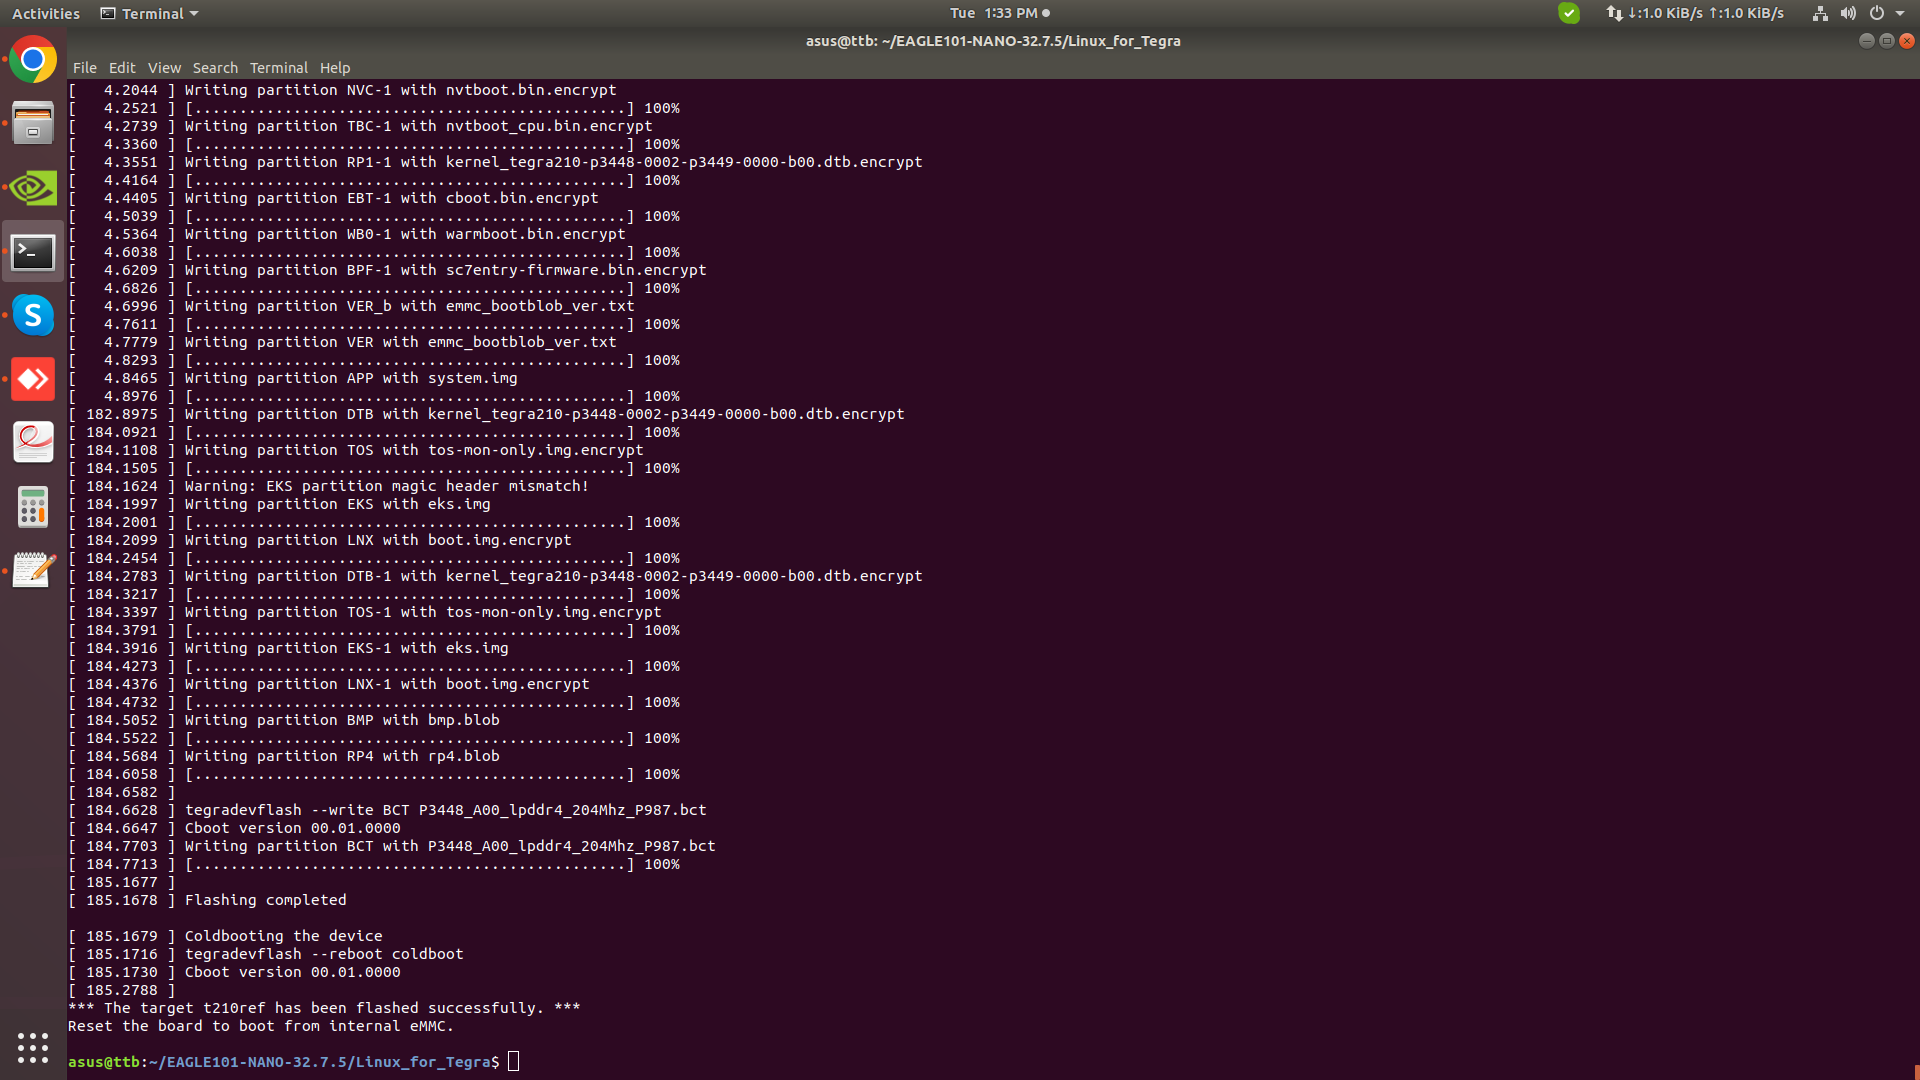
Step 3. Flash the System to Tanna TechBiz Eagle-101
Since we alreadly force the Tanna TechBiz Eagle-101 into the recovery mode and the module is Jetson Nano. We can directly flash the system into Tanna TechBiz Eagle-101 execute following command:
sudo ./flash.sh jetson-nano-devkit-emmc mmcblk0p1
Flashing L4T takes about 10 minutes, or more under a slow host computer.
At this moment, we can unplug the jumper and then power up the Tanna TechBiz Eagle-101 again to use it.
Flashing Jetpack OS with Tanna TechBiz BSP
❕INFO
Recently, NVIDIA has updated the DRAM model, and Seeed has currently released a new firmware that is compatible with this module update.
If, during the process of flashing the official NVIDIA image, the system freezes due to the DP signal (manifested as an inability to flash and getting stuck on the NVIDIA interface), it proves that you have purchased the updated module. In this case, you need to flash the factory image we currently provide.
The current differences between this factory image and the original one are as follows:
The DP configuration has been modified (to prevent the system from freezing due to the DP signal on some modules).
The SD card slot is set to the available state by default, and there is no need to additionally modify the device tree to enable the SD card slot function.
The image contains Jetpack4.6.5.
The latest PCN has been incorporated.
Connect the Jetson Nano into your keyboard.
Connect the Jetson Nano into your mouse.
Grab the “Power Supply Applicable for Jetson Nano 5V/4A OD 5.5mm ID 2.1mm”.
Connect the power supply to the 5V/4A Power Jack. The developer kit will power on automatically.
Allow 1 minute for the developer kit to boot.
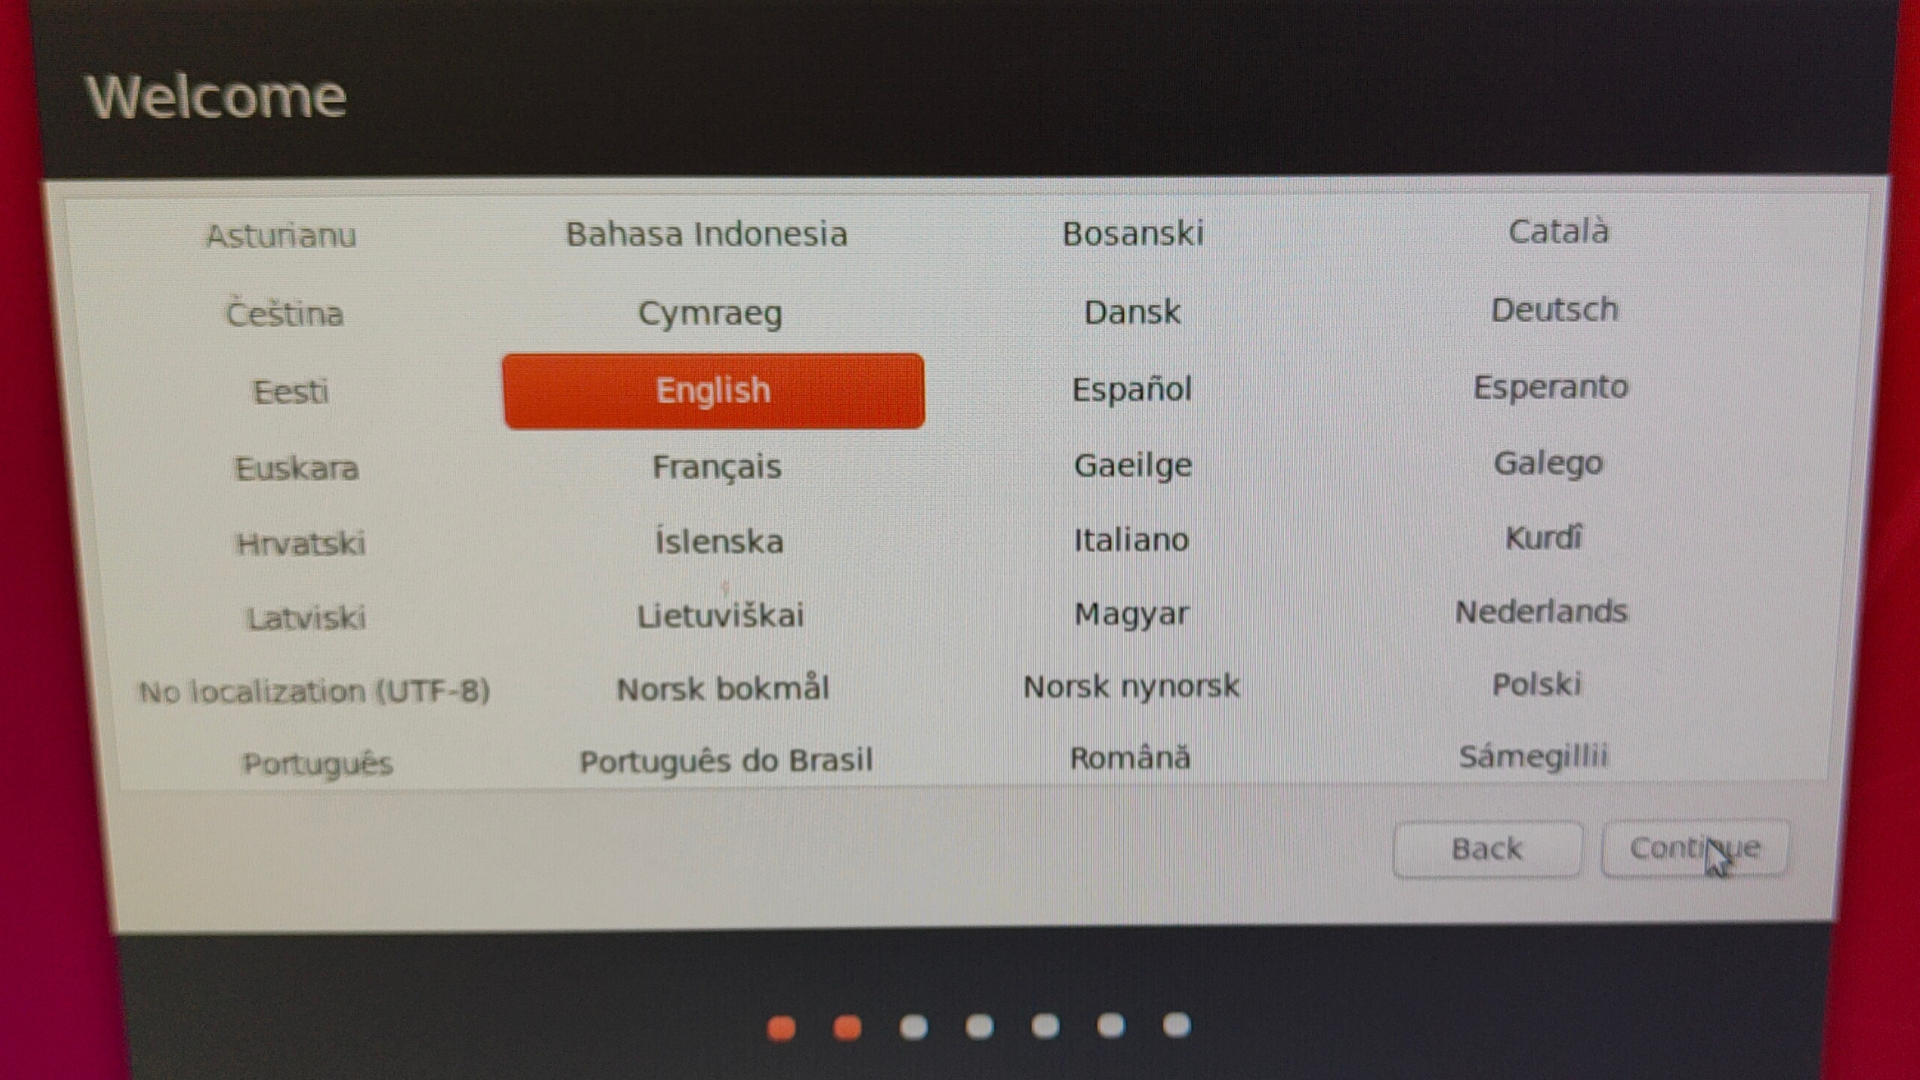
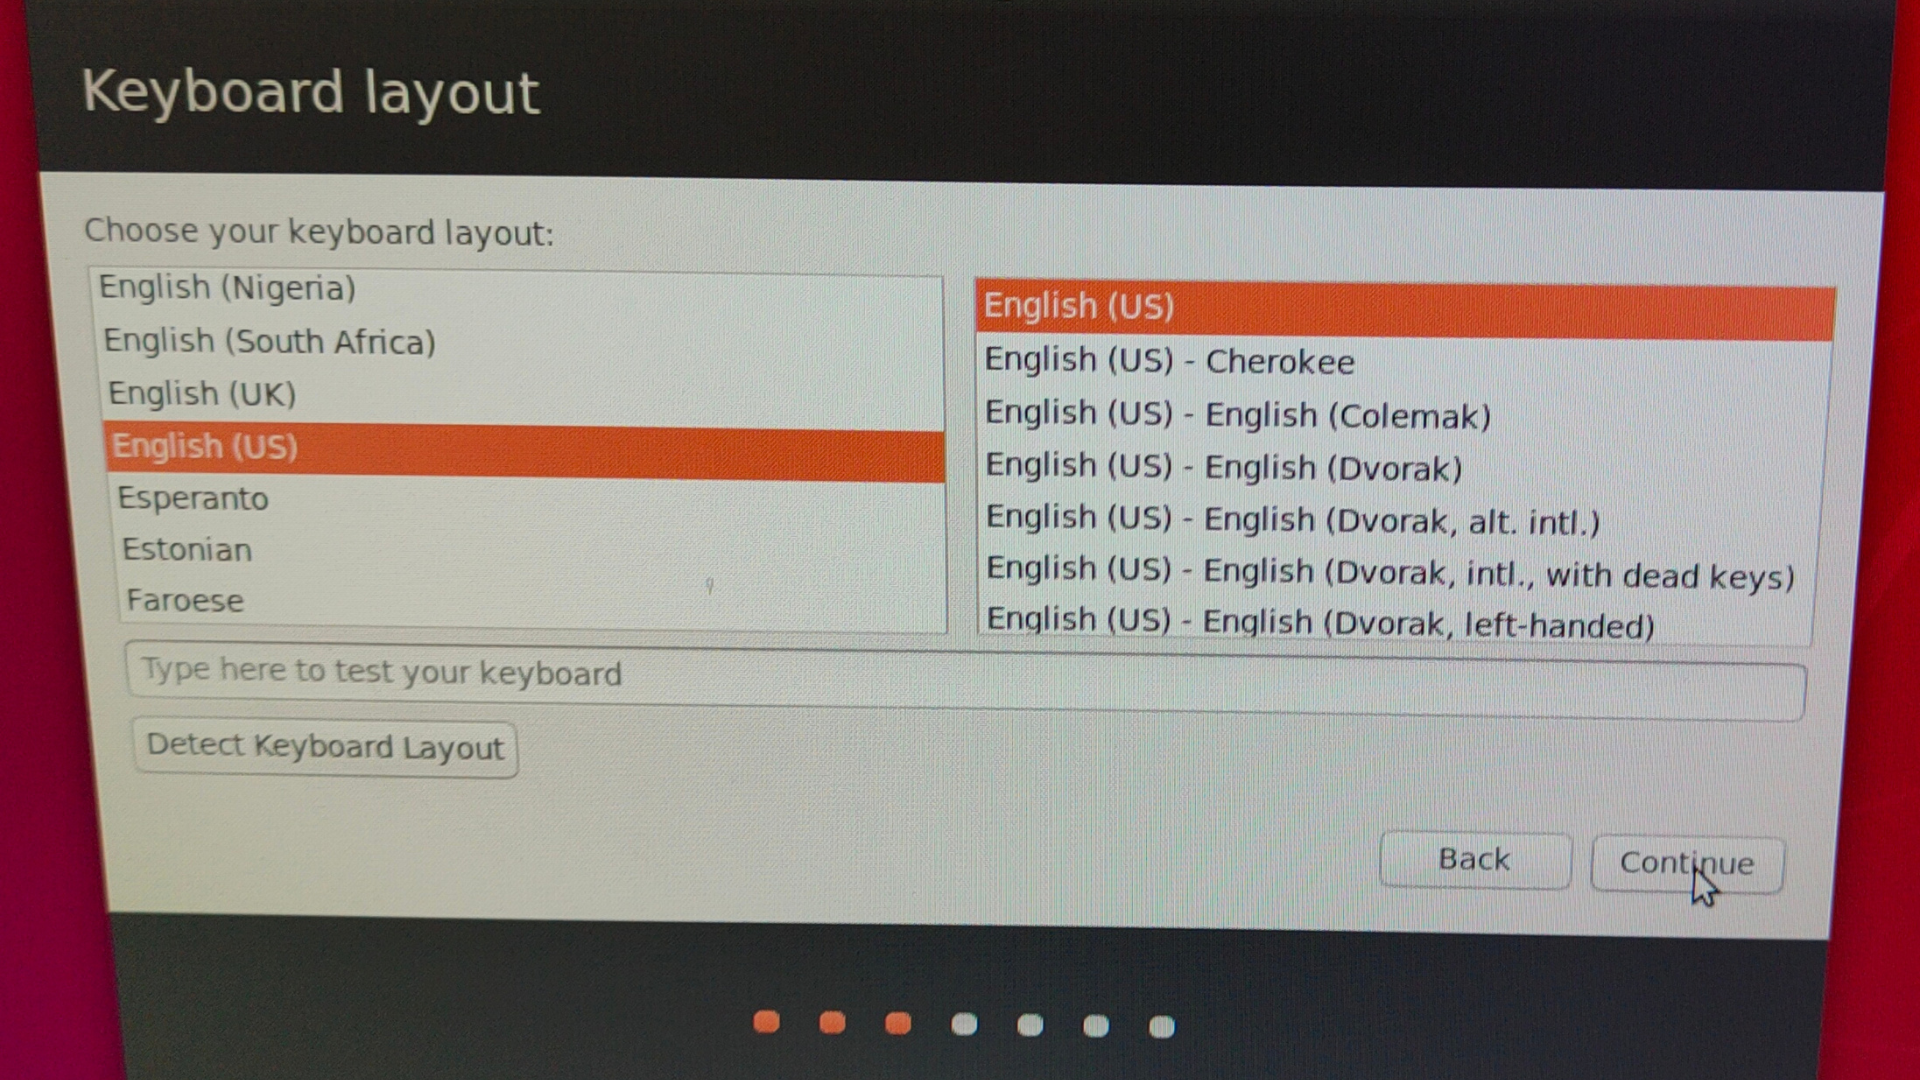
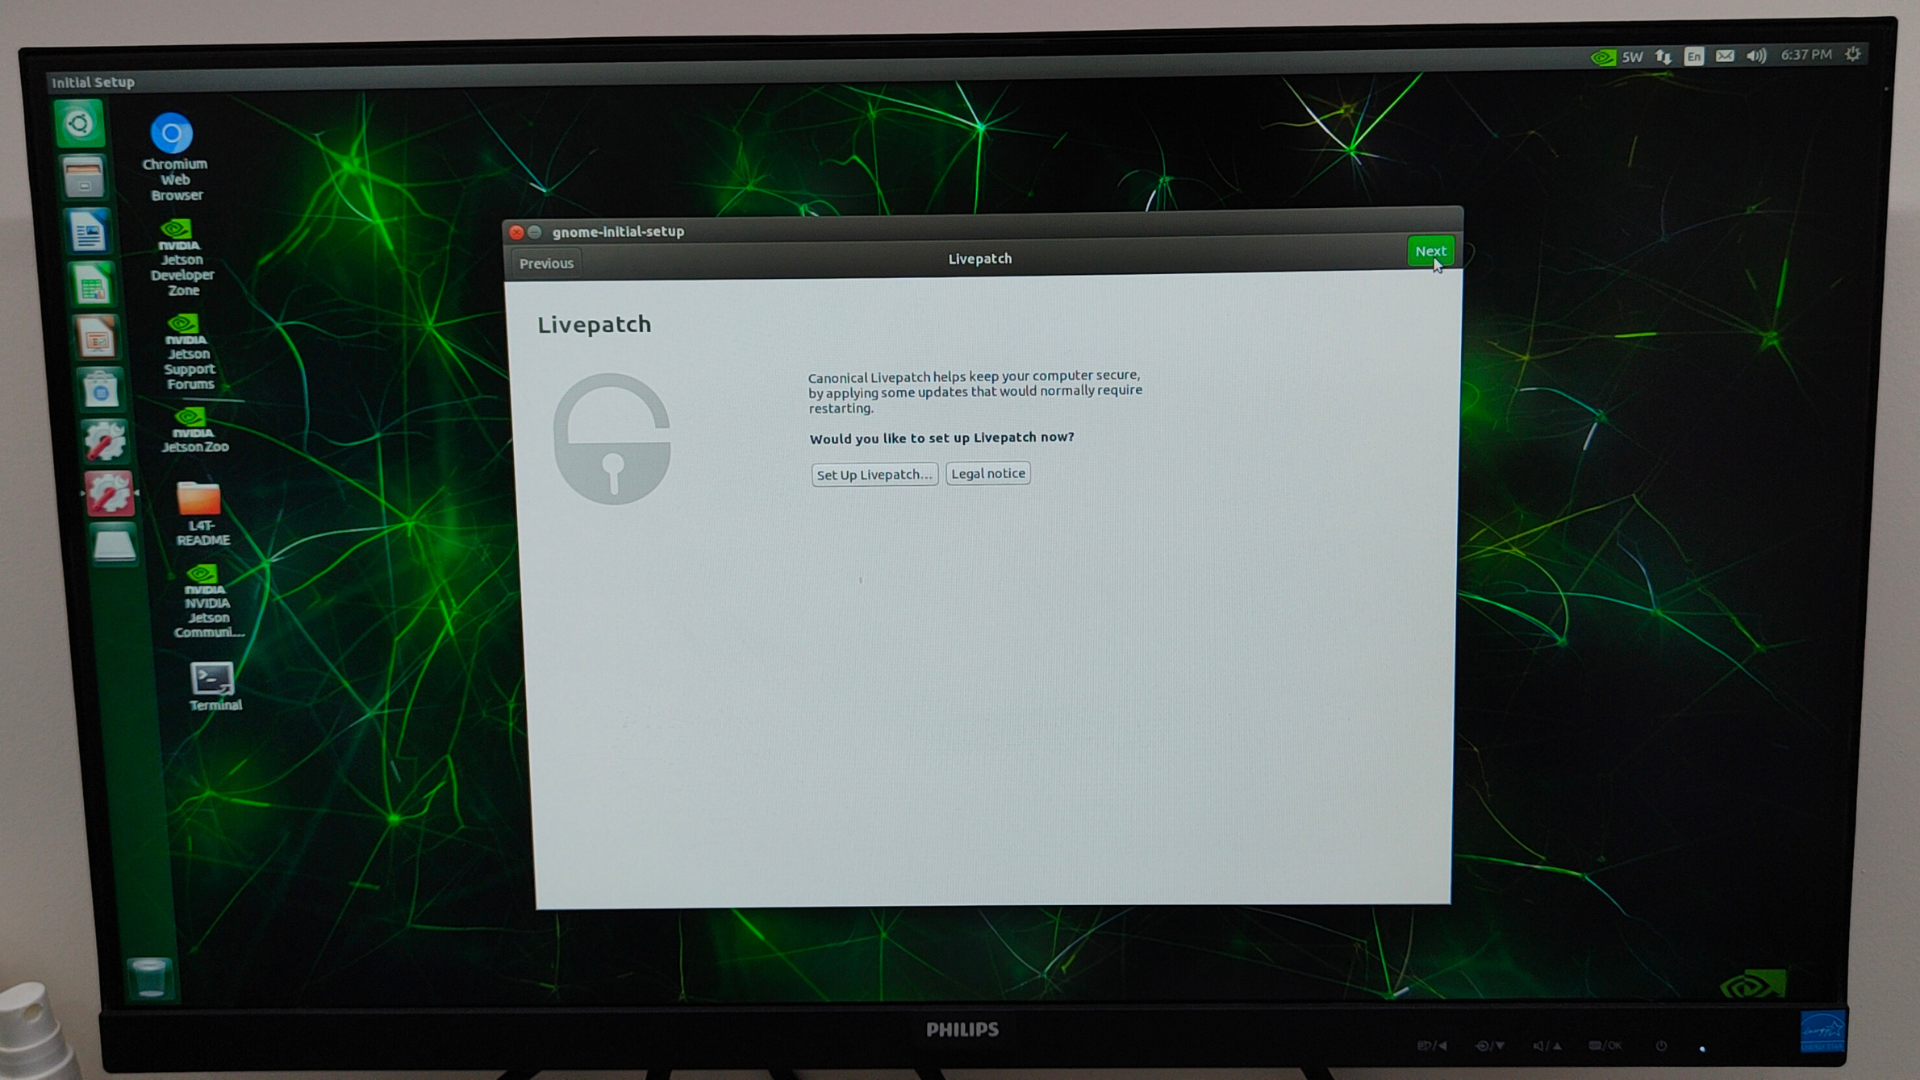
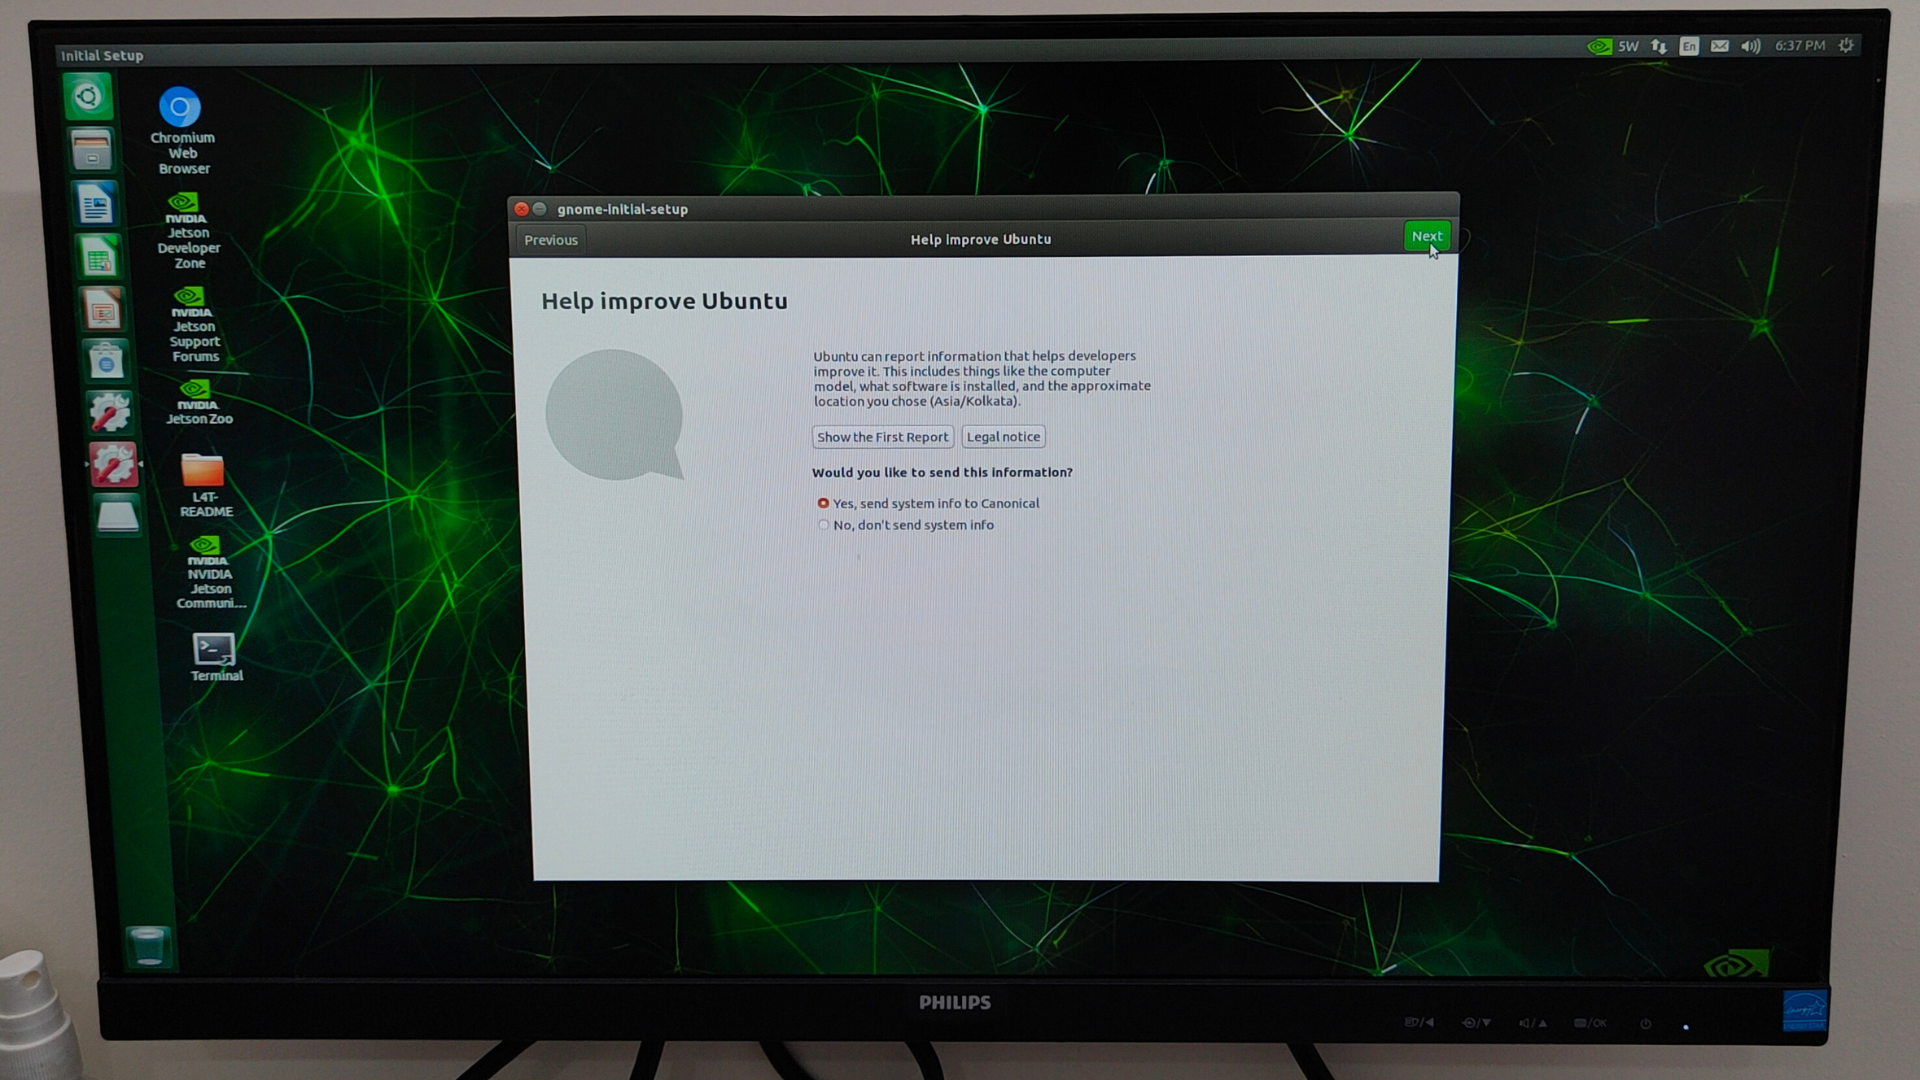
A green LED next to the Micro-USB connector will light as soon as the developer kit powers on. When you boot the first time, the developer kit will take you through some initial setup, including:
Review and accept NVIDIA Jetson software End User License Agreement.
Select the system language.
Select the keyboard layout.
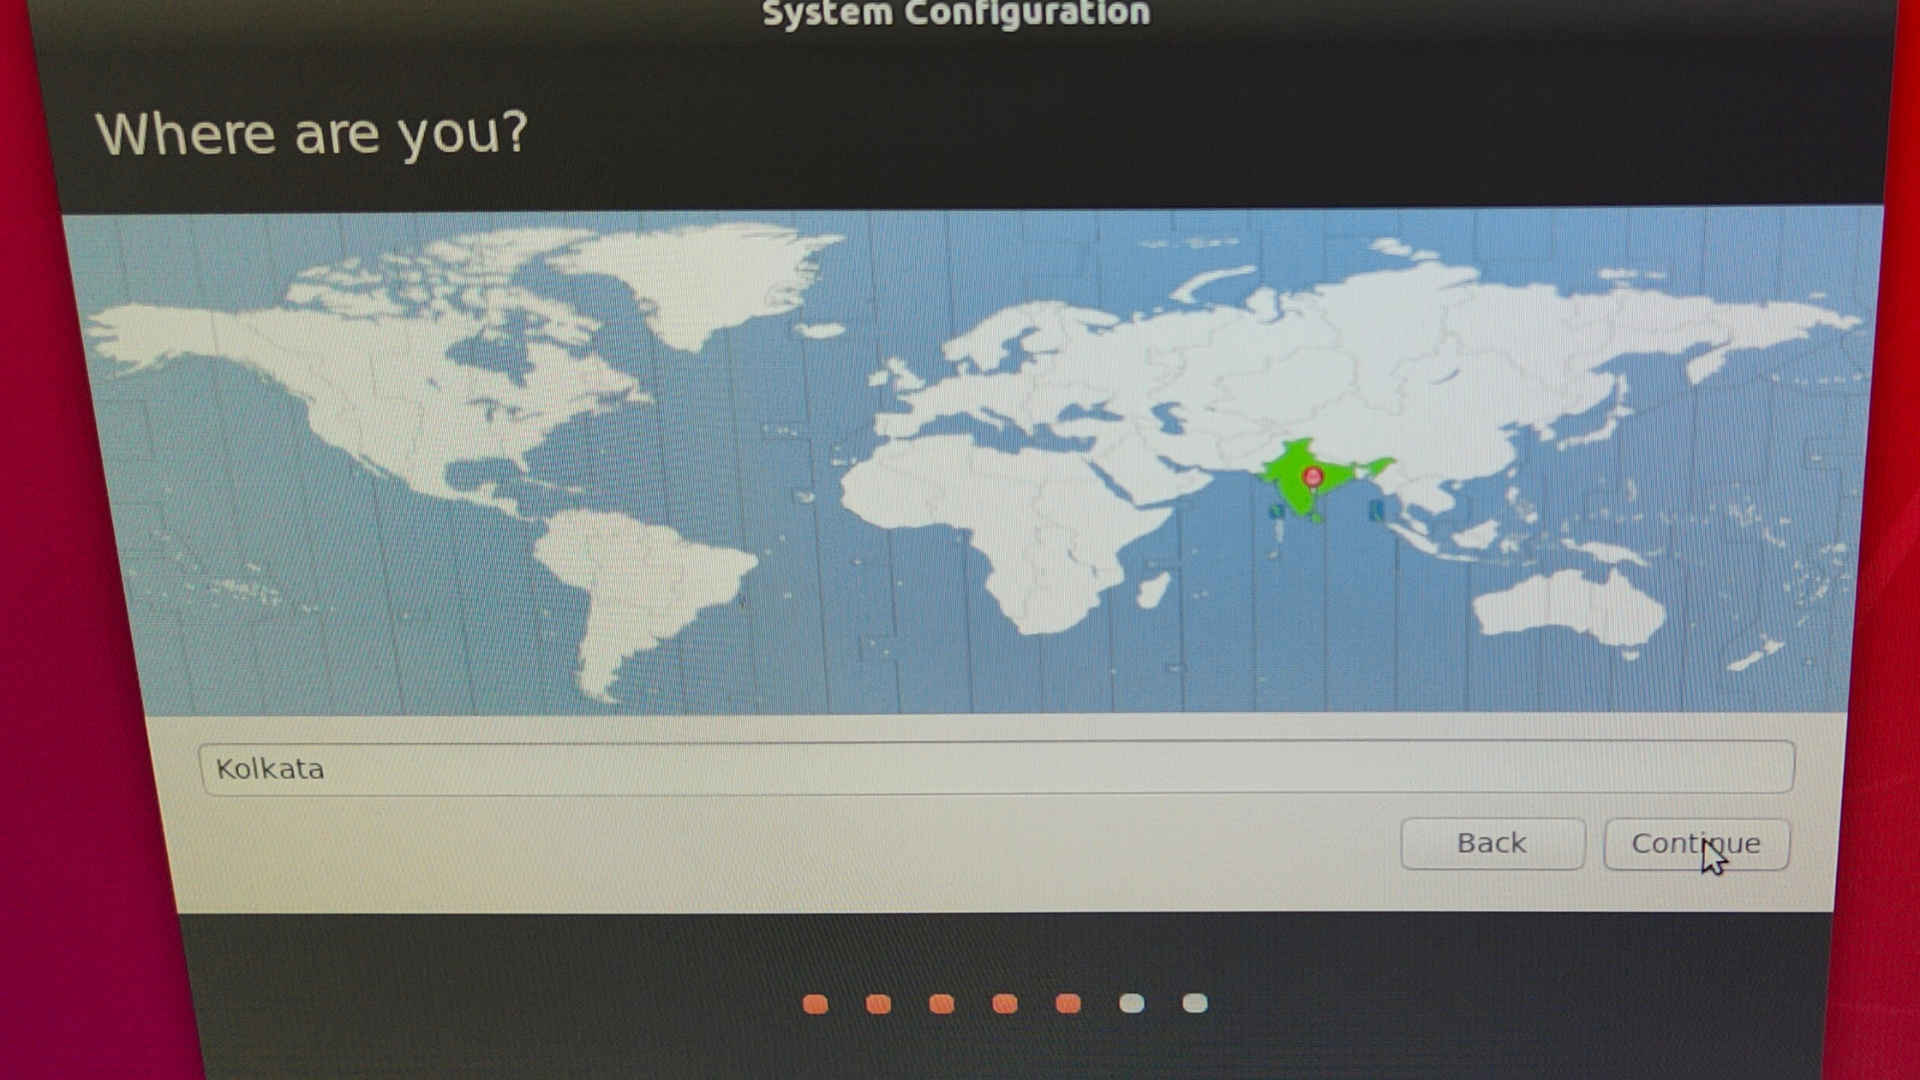
Select the time zone.
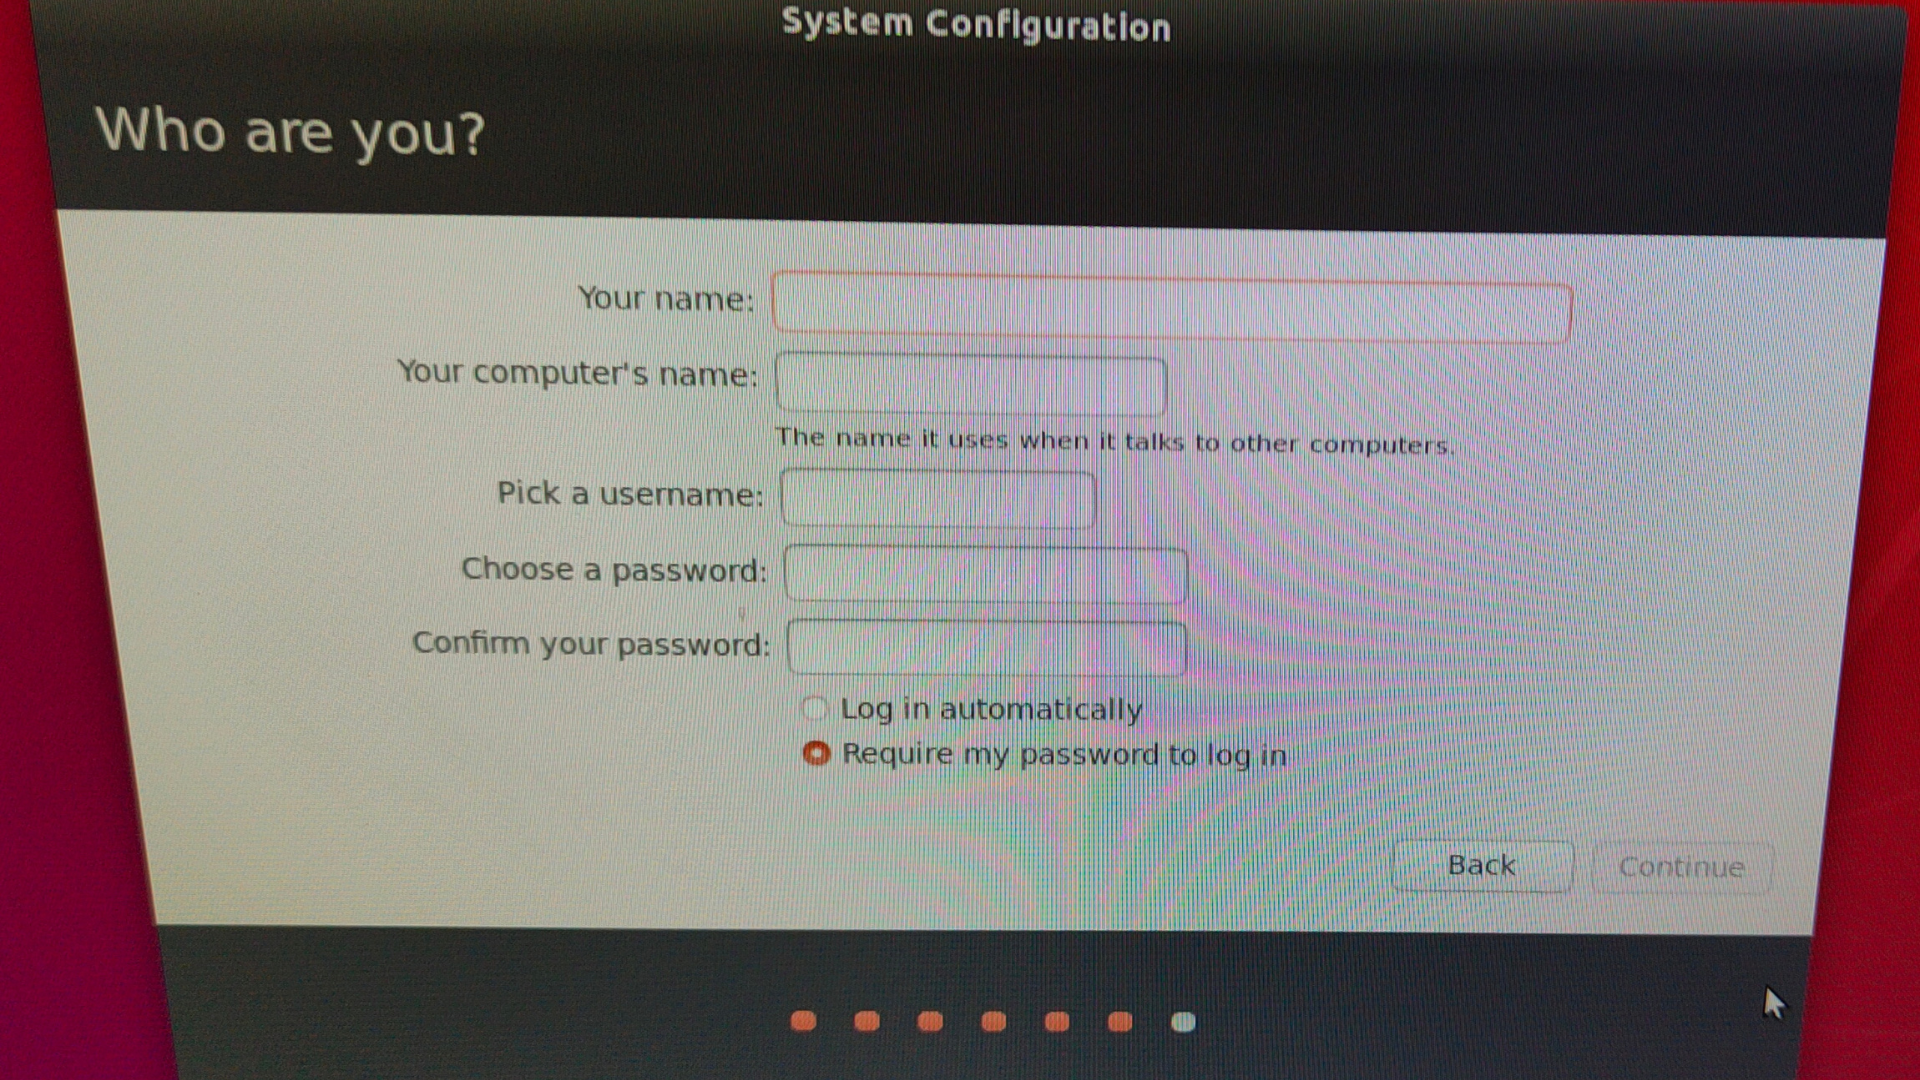
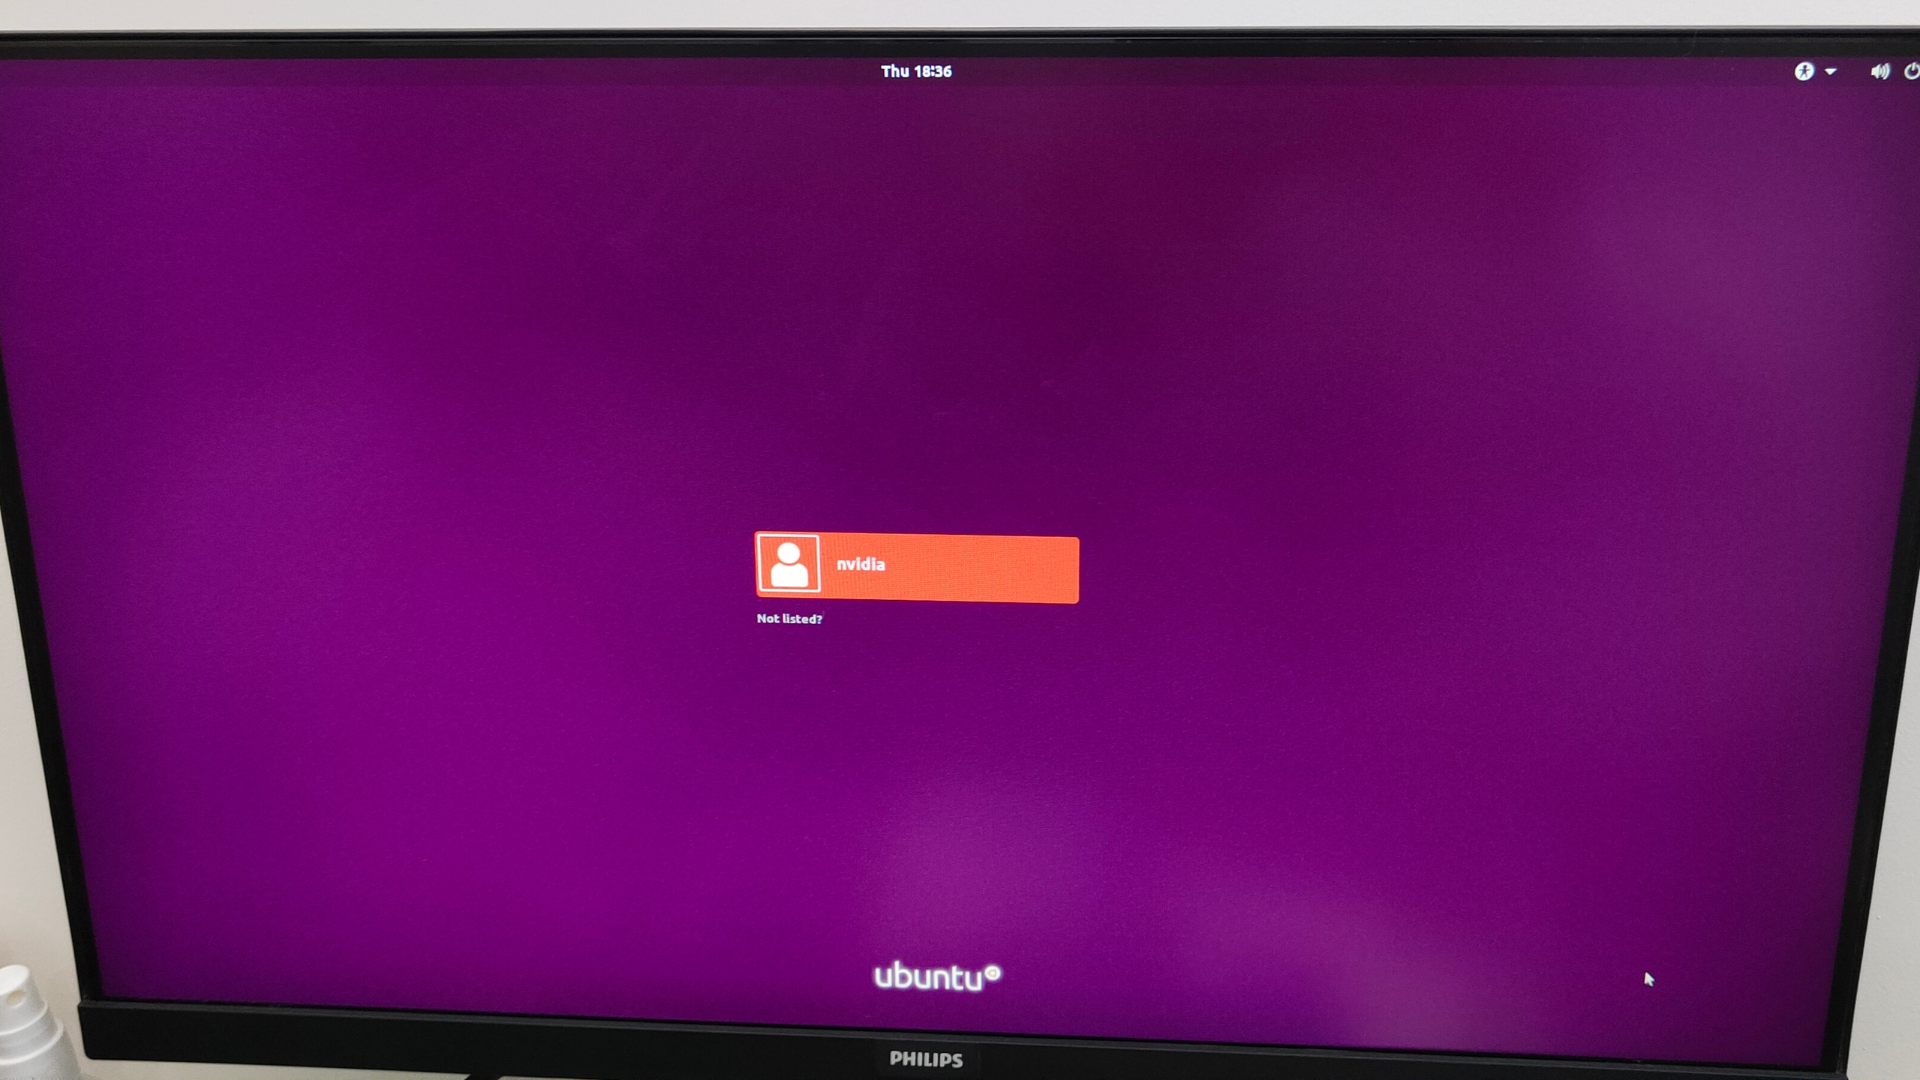
Create a username, password, and computer name. Be sure to select “Log in automatically.”
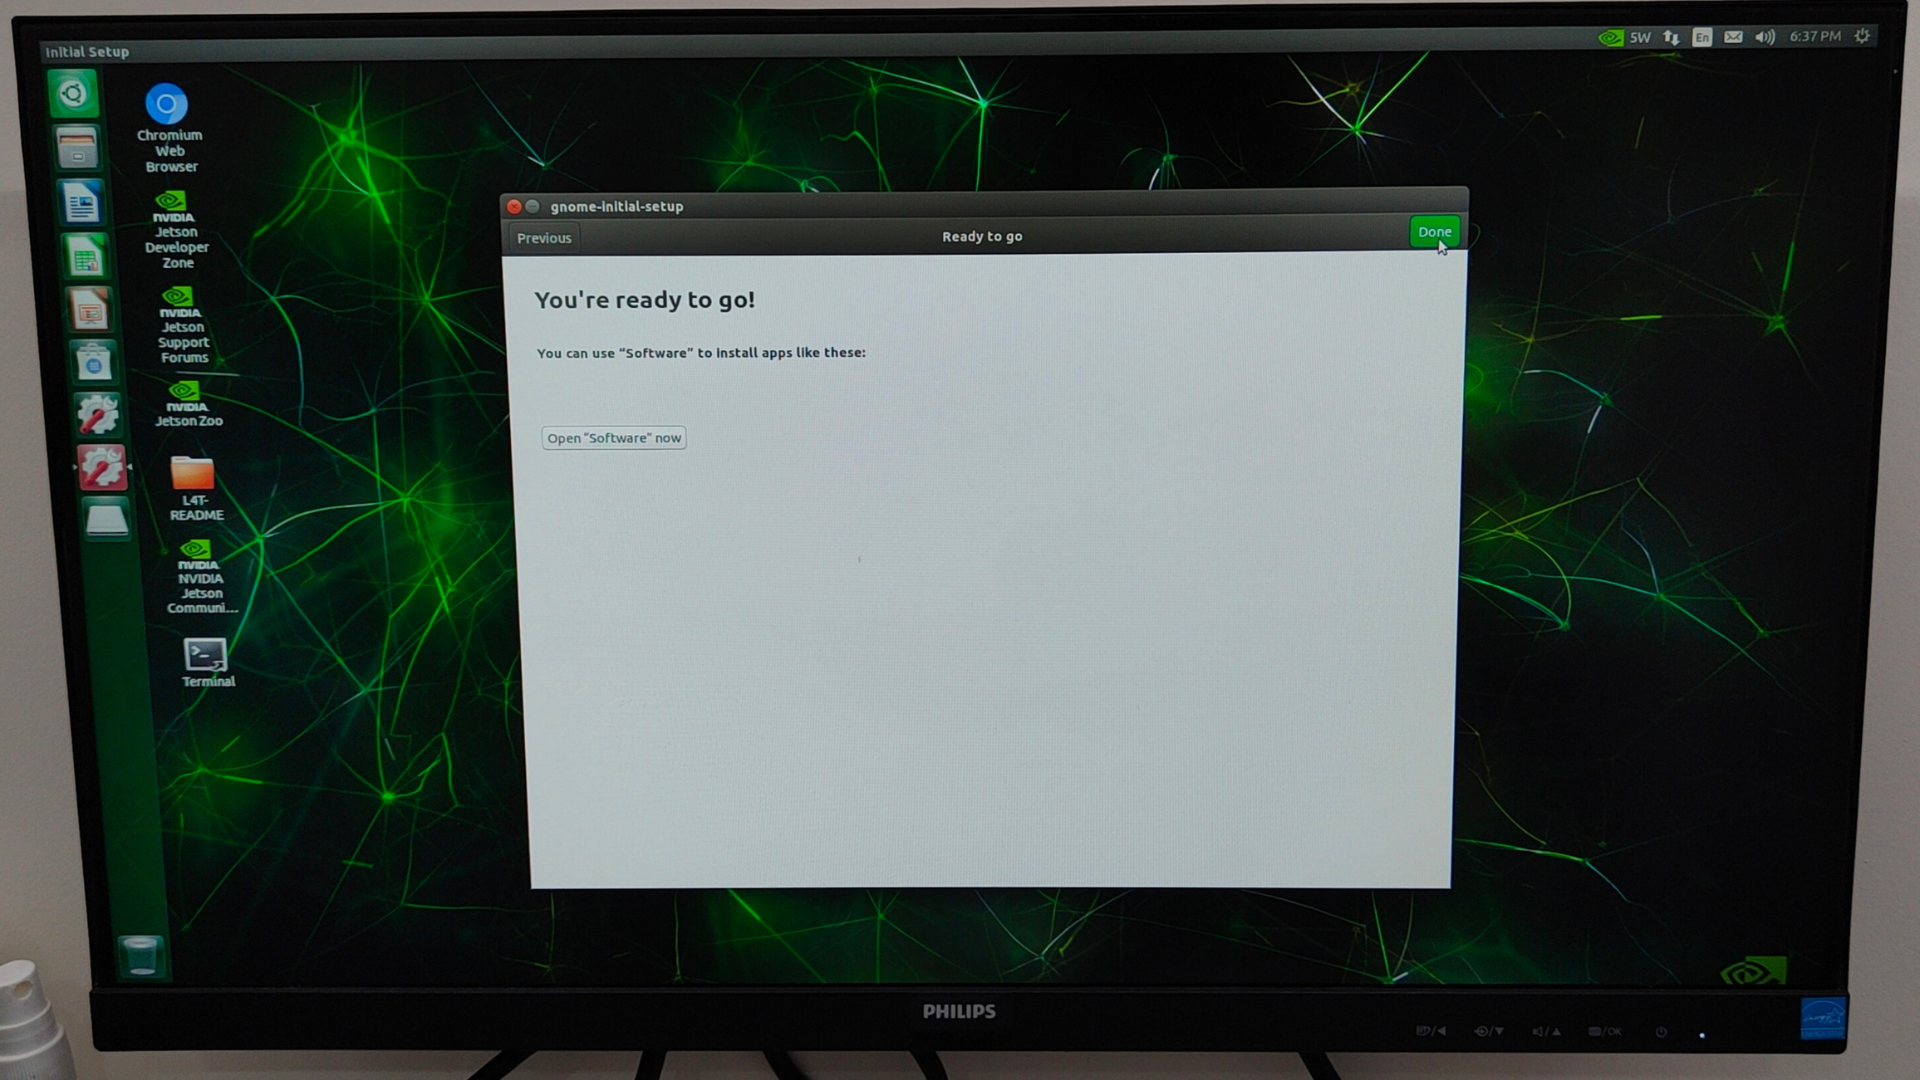
Here is the screen you should see now.
Update QSPI process and click Continue.
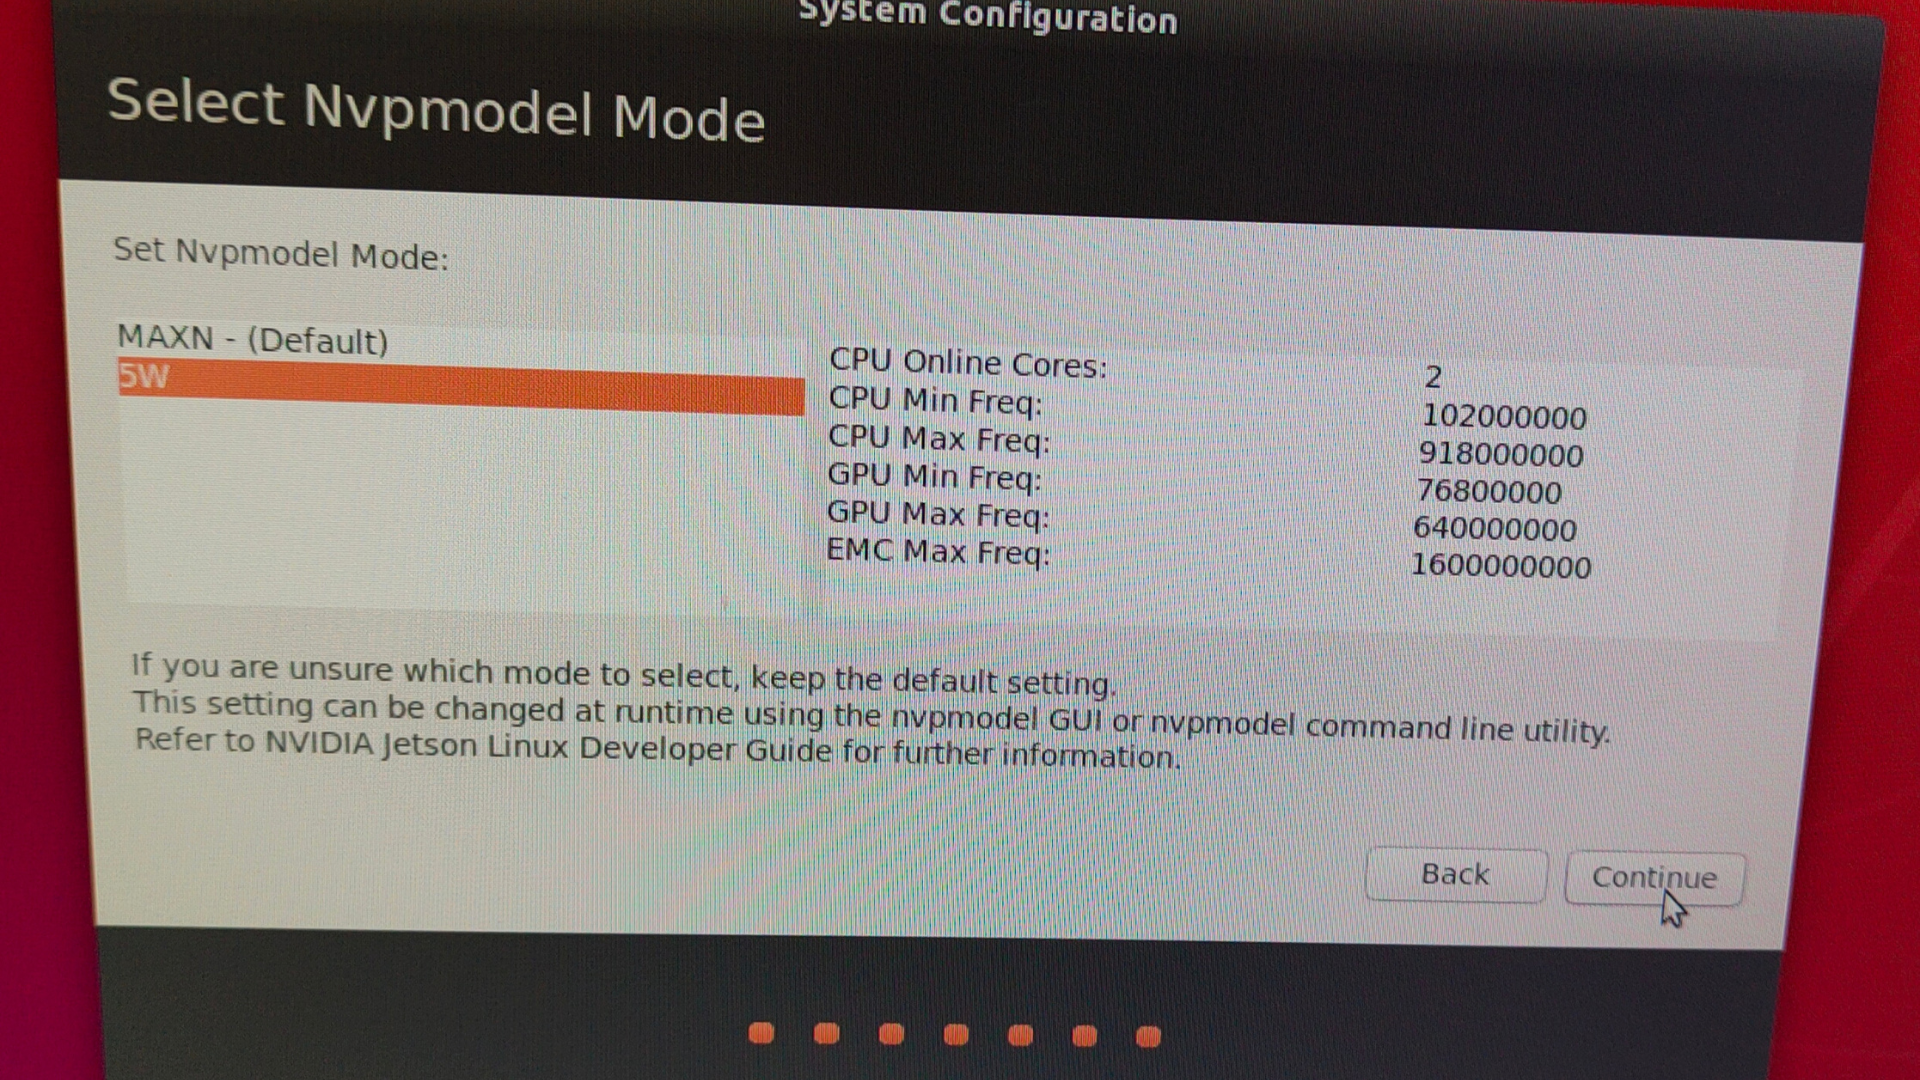
Keep the default setting for the Nvpmodel Mode, and click Continue.
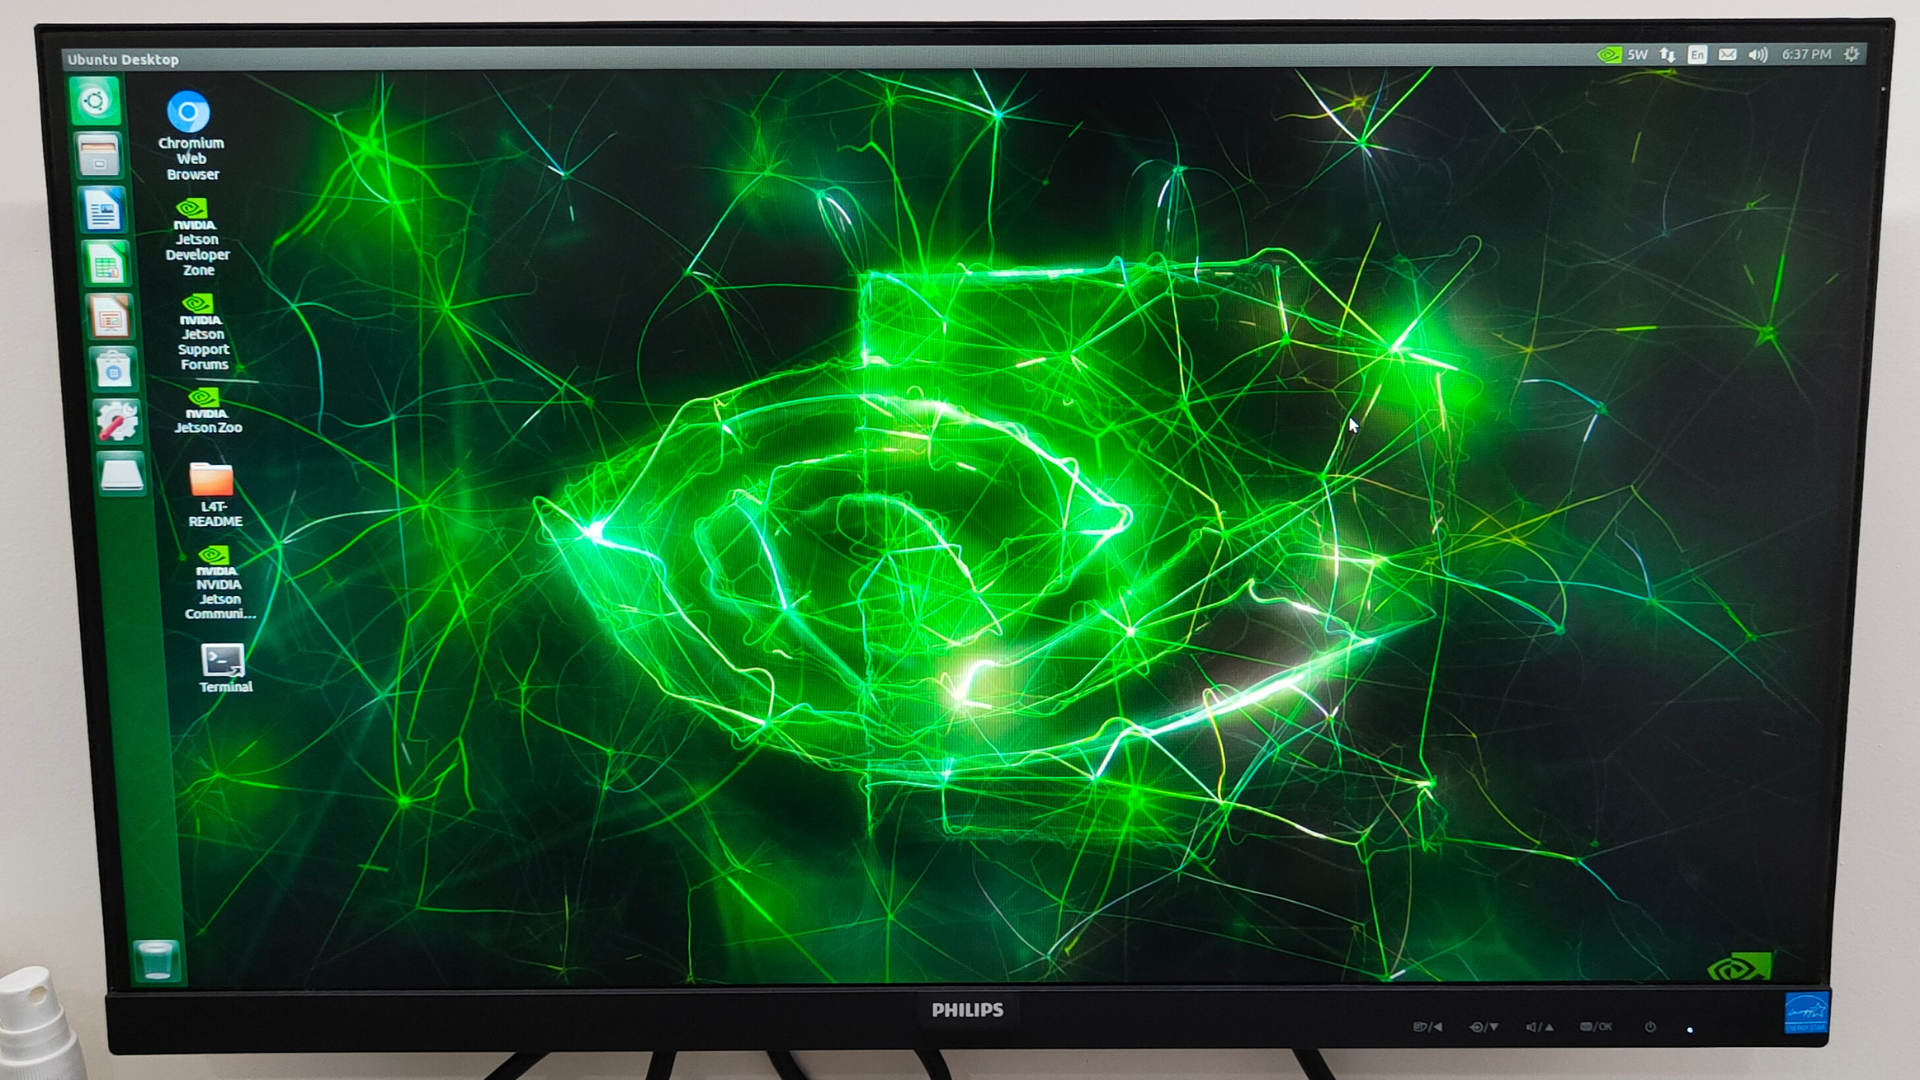
Your Nvidia will automatically reboot to the Ubuntu desktop.
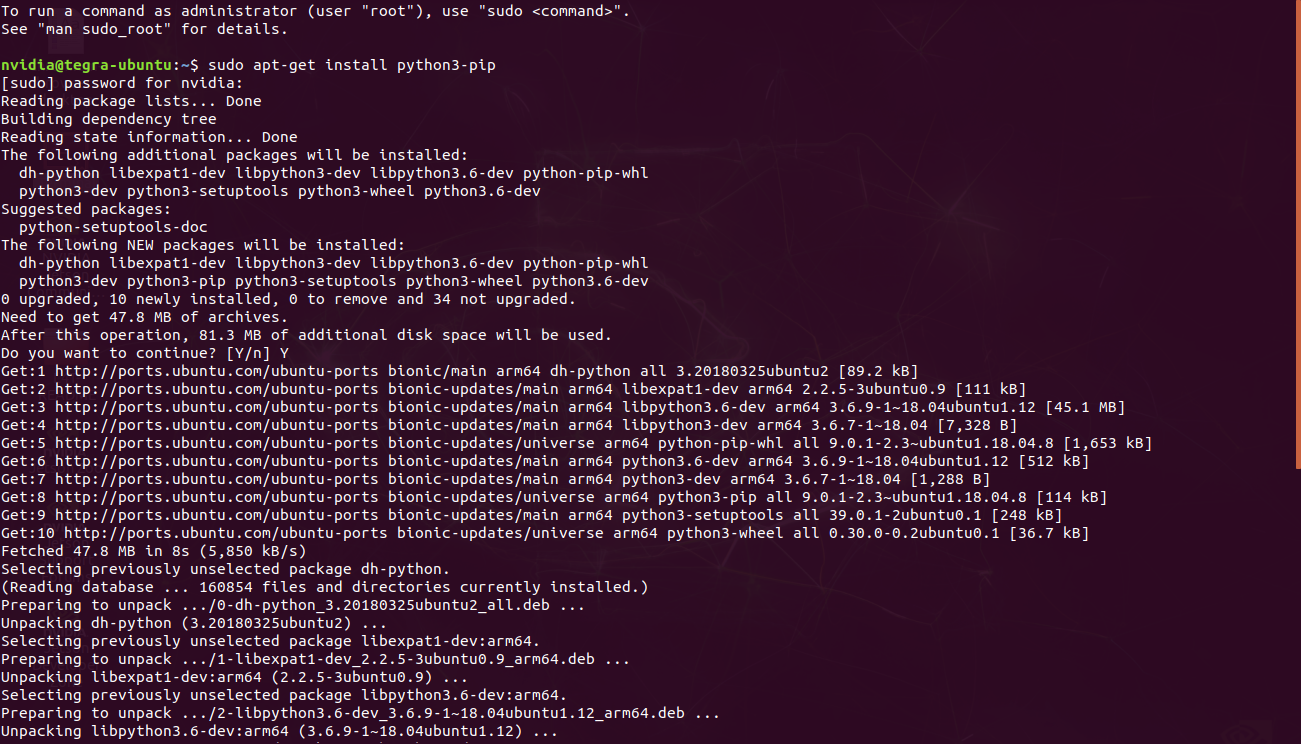
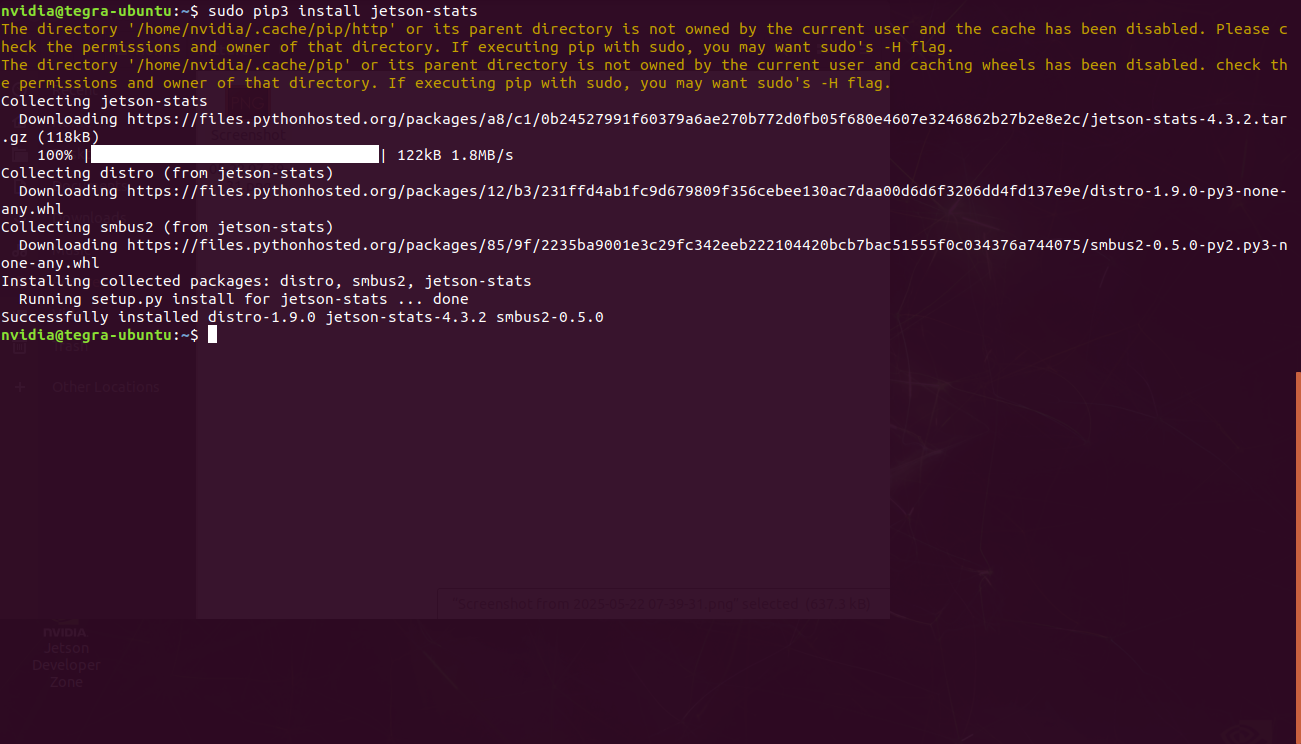
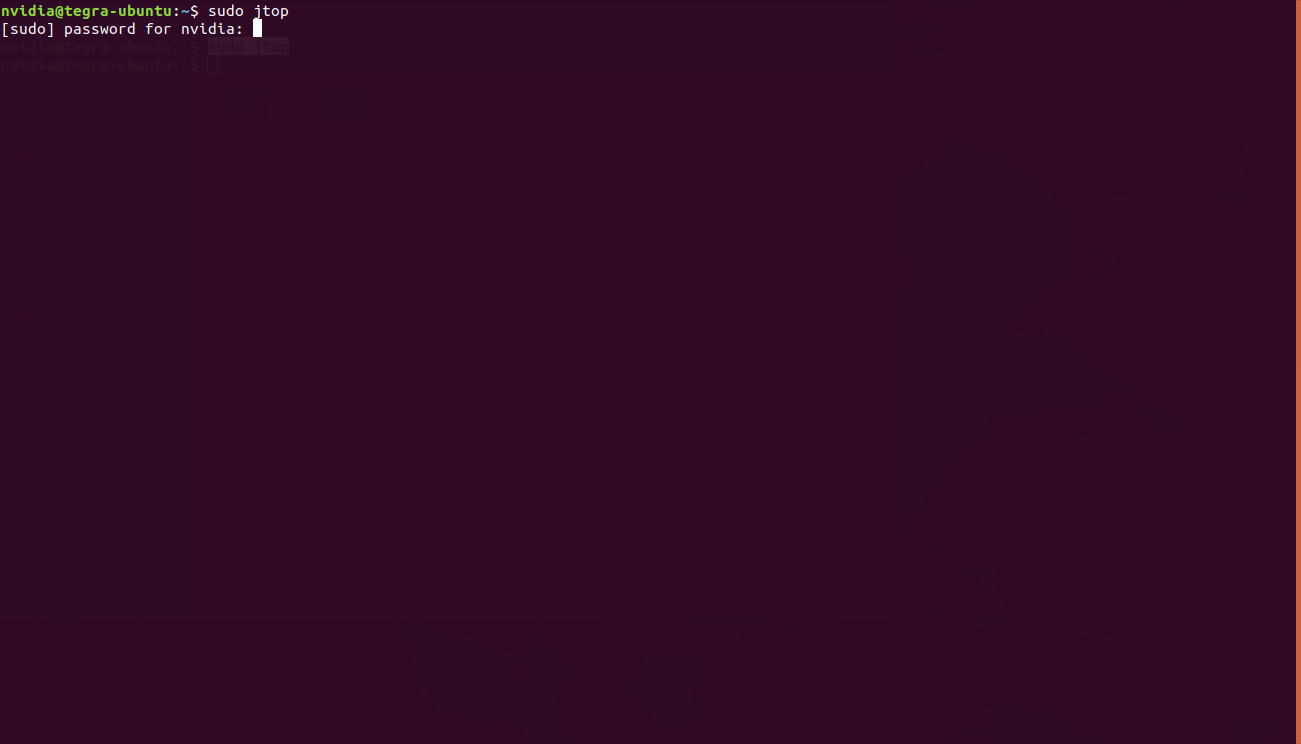
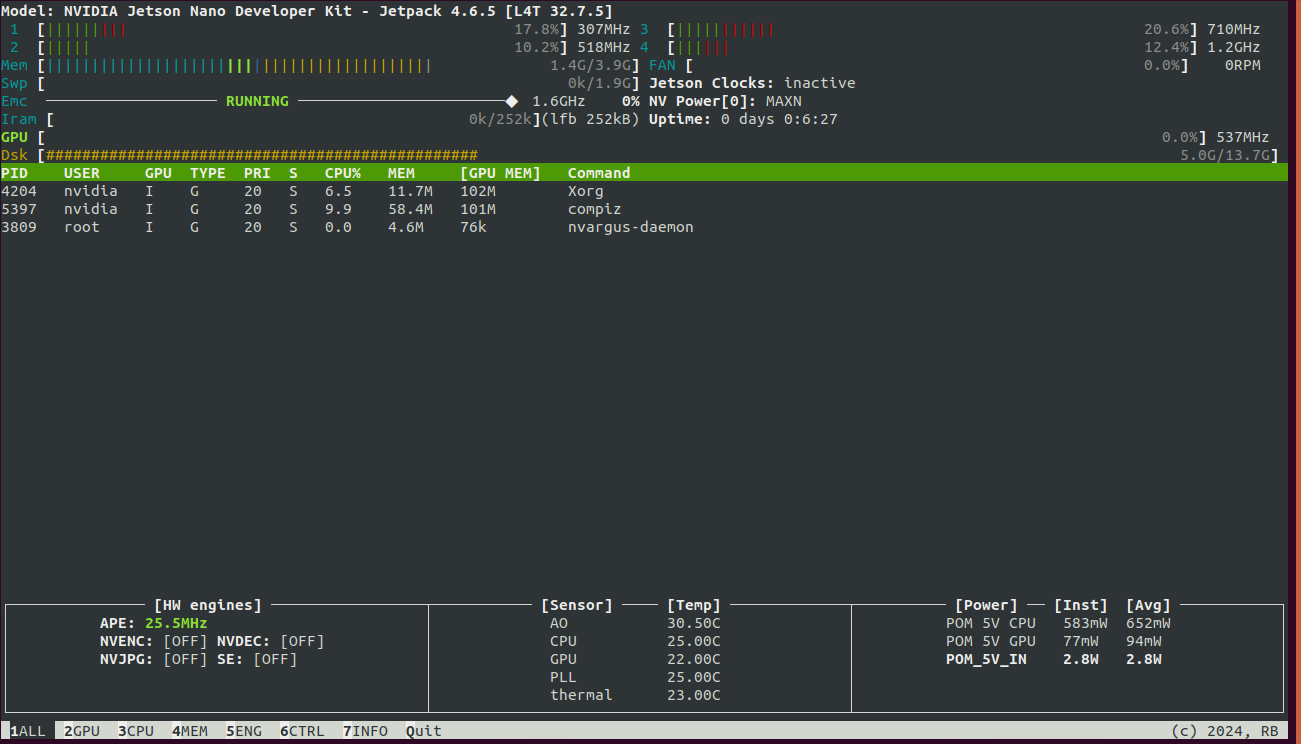
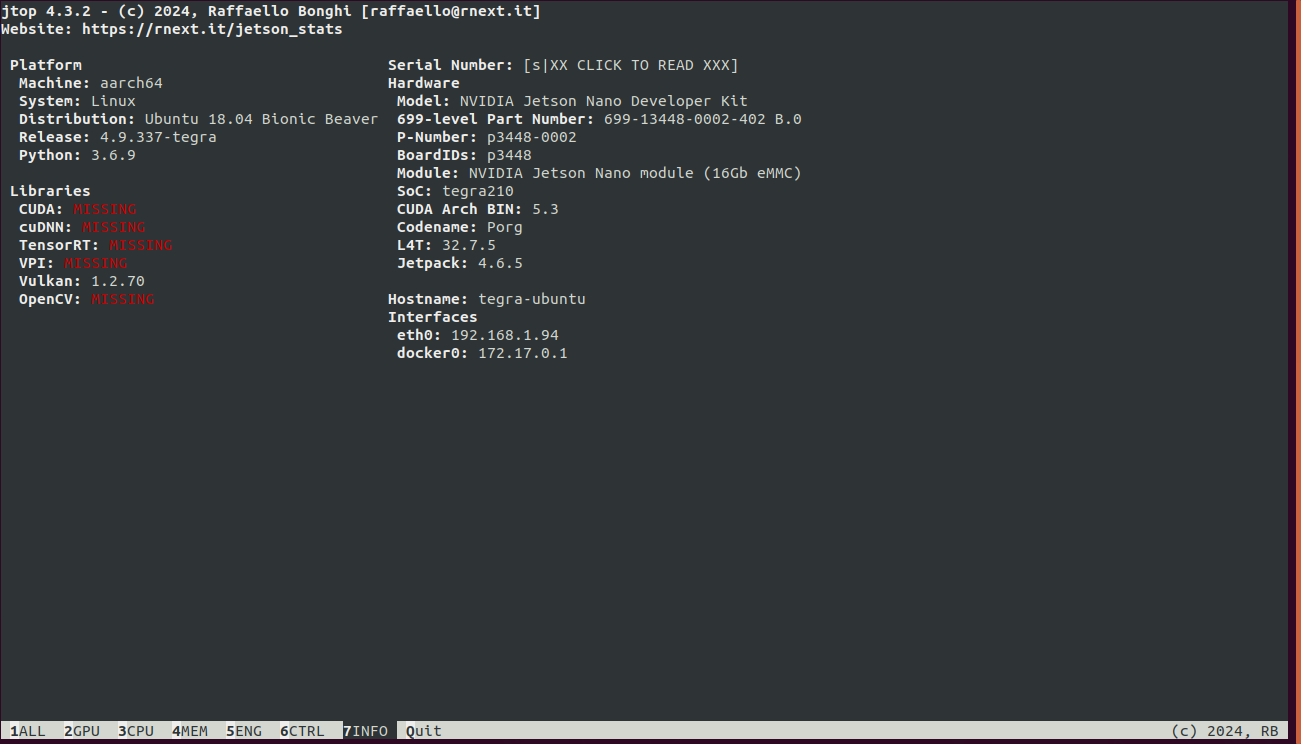
Here some commands for the checking of the BSP (JetPack) Version Installation on Eagle - 101
sudo apt-get install python3-pip
sudo pip3 install jetson-stats
sudo jtop
Special thanks to our fellow Engineer and Colleague -Kishan & Dharmesh


 July 16, 2026